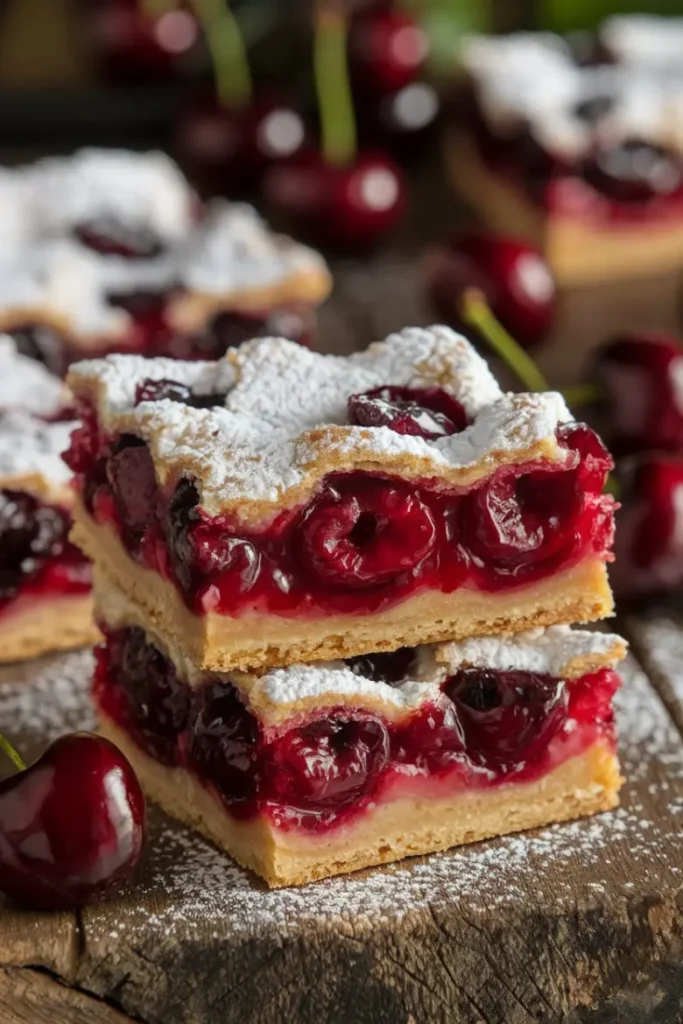
Cherry Pie Bars – The Best Sweet and Buttery Dessert Recipe
As soon as the weather turns cold and the scarves come out, my sisters and I fall into a tradition we’ve kept since we were teenagers—baking day. It’s nothing official. There’s no set time or schedule. Someone just texts “bake?” and next thing you know, we’re all in the kitchen together, elbow-deep in flour, arguing about music, sneaking bites of cookie dough, and trying not to burn anything. It’s the kind of day that doesn’t feel like much while it’s happening, but becomes a memory you carry with you for years.
One winter, the plan was to make cherry pie for our holiday get-together. But of course, between the jokes and the coffee refills and the absolute chaos of five people sharing one oven, we forgot to make the crust until the last minute. Out of panic—or maybe genius—we tossed together a quick bar version instead. We pressed some buttery dough into the pan, poured on the cherry filling, sprinkled the top with crumbles, and hoped for the best.
To this day, I don’t remember what happened to the rest of the desserts we made that afternoon, but those Cherry Pie Bars disappeared within minutes. Something about the soft, cookie-like base and that bright cherry filling just worked. It wasn’t polished, but it was warm and satisfying and full of laughter. We’ve made them every year since—on purpose now.
Whenever I bake these bars, I think of that snowy day: the sound of boots kicking off at the door, the way the kitchen smelled like vanilla and sugar, and all of us huddled by the oven waiting for something sweet to come out. These Cherry Pie Bars may be simple, but they’re baked with memories—and that makes every bite just a little more special.
Why You’ll Love This Recipe
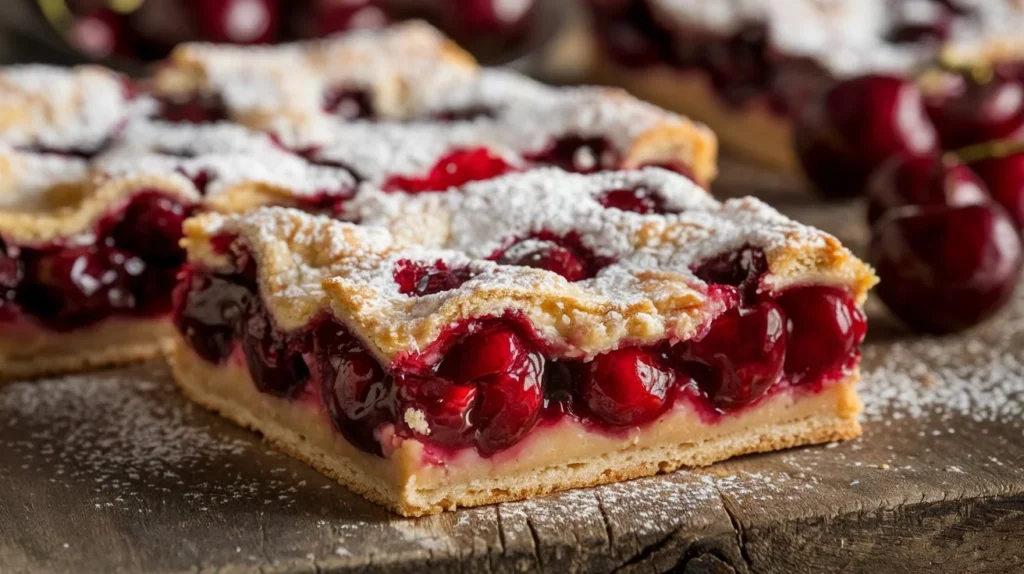
If you love cherry pie but don’t want to go through the hassle of rolling out a pie crust, this recipe is your new best friend. These Cherry Pie Bars capture everything you adore about a homemade cherry pie—sweet, tangy cherries, a buttery crust, and a crumbly golden topping—but in a simple, sliceable, and shareable form.
Easy to Make: No pie dough, no rolling pins—just mix, press, and bake. Perfect for beginners or busy bakers.
Perfect for Any Occasion: Whether you need a quick dessert for a potluck, a picnic, a holiday gathering, or just a sweet treat to enjoy with coffee, these bars fit the bill.
Customizable: Not a fan of cherries? Swap them out for blueberries, apples, or even a mix of berries. You can also adjust the sweetness to your liking.
Great Texture: The combination of a buttery shortbread crust, gooey fruit filling, and crumbly topping makes each bite absolutely irresistible.
Easier to Serve: Unlike traditional pie, which can be tricky to cut and serve, these bars hold their shape beautifully and are perfect for grabbing on the go.
Key Ingredients and Substitutions
Every ingredient in this recipe plays a key role, but if you need to make swaps, here’s what you can do:
Butter: The base of the crust and crumble topping, giving it richness and a melt-in-your-mouth texture. If you need a dairy-free option, use vegan butter or solid coconut oil.
Granulated Sugar: Adds sweetness and helps create the perfect crust. If you prefer a deeper flavor, swap with brown sugar for a hint of caramel-like richness.
Vanilla Extract: Enhances the overall flavor of the bars. You can substitute with almond extract for a nutty, bakery-style flavor.
All-Purpose Flour: The structure of the crust and crumble. For a gluten-free version, use a 1:1 gluten-free flour blend.
Cherry Pie Filling: The star of the recipe! While canned filling works great, you can make your own using fresh cherries, sugar, lemon juice, and cornstarch for a fresher taste.
Powdered Sugar & Milk (for the glaze): The final touch that adds a little sweetness. You can swap milk with lemon juice for a tangy glaze or use melted white chocolate for a richer finish.
How to Make Cherry Pie Bars (Step-by-Step)
Making these bars is incredibly simple. Follow these steps for perfect results:
Step 1: Prepare the Dough
In a mixing bowl, beat softened butter and sugar together until light and fluffy.
Add vanilla extract and a pinch of salt for flavor.
Slowly mix in the flour until the dough comes together. It should be slightly crumbly but hold when pressed.
Step 2: Form the Crust
Take two-thirds of the dough and press it firmly into a 9x13-inch baking dish lined with parchment paper.
Make sure the layer is even and reaches the corners of the pan.
Step 3: Add the Cherry Filling
Spoon the cherry pie filling over the crust, spreading it evenly so every bite has a balance of fruit and crust.
Step 4: Make the Crumb Topping
Take the remaining one-third of the dough, crumble it into small pieces, and sprinkle it over the cherry filling.
Step 5: Bake to Perfection
Place the dish in a preheated 350°F (175°C) oven and bake for 35 minutes, or until the top is golden brown.
Step 6: Cool & Glaze
Let the bars cool for at least 15 minutes before adding the glaze.
Mix powdered sugar and milk until smooth, then drizzle it over the cooled bars.
Step 7: Slice & Serve
Once the glaze sets, cut into squares and serve. These bars taste great warm or at room temperature.
Expert Tips for Success
Chill the Dough for a Flakier Texture: If your dough feels too soft or sticky, pop it in the fridge for 10 minutes before pressing it into the pan. This helps create a firmer crust.
Don’t Overload with Filling: Too much cherry filling can make the bars soggy. Stick to one 21-ounce can for the perfect balance.
Let Them Cool Before Cutting: The bars hold their shape better once they’ve had time to set. For cleaner slices, refrigerate them for 30 minutes before cutting.
Add a Touch of Almond Flavor: A few drops of almond extract in the dough or glaze will enhance the cherry flavor beautifully.
Try Pre-Baking the Crust: For an extra crisp bottom layer, bake the crust for 8-10 minutes before adding the cherry filling.
Variations and Customizations
Want to change things up? Try these creative twists:
Gluten-Free Version: Swap the all-purpose flour for a 1:1 gluten-free flour blend.
Different Fruit Fillings: Substitute cherry pie filling with apple, blueberry, raspberry, or even a mix of berries.
Chocolate Drizzle: Skip the glaze and drizzle the bars with melted white or dark chocolate instead.
Nutty Crunch: Sprinkle chopped pecans, walnuts, or almonds into the crumble topping for added texture.
Cinnamon Sugar Twist: Add ½ teaspoon of cinnamon to the crumble topping for a warm, spiced flavor.
Storage and Reheating Instructions
Room Temperature: Store the bars in an airtight container for up to 2 days.
Refrigerator: Keep them in the fridge for up to 5 days for maximum freshness.
Freezer: Wrap bars individually in plastic wrap and place them in an airtight container. They can be frozen for up to 3 months.
Reheating: If you prefer them warm, heat in the microwave for 10-15 seconds or in a 300°F oven for 5 minutes.
Serving Suggestions
With Ice Cream: A scoop of vanilla, cinnamon, or almond ice cream takes these bars to the next level.
With Whipped Cream: A dollop of homemade whipped cream or Greek yogurt adds a nice contrast to the sweet bars.
Paired with Coffee or Tea: Enjoy a bar with a hot cup of coffee, chai tea, or a glass of milk for the perfect afternoon treat.
As a Holiday Dessert: These bars make a great addition to Thanksgiving, Christmas, or summer BBQ spreads.
Summary and Encouragement
These Cherry Pie Bars are everything you love about cherry pie, but easier, quicker, and more convenient. Whether you’re baking for a special occasion or just treating yourself, they deliver the perfect balance of buttery, sweet, and tart flavors. Give them a try, and they might just become your new favorite dessert!
Love cherry pie but don’t want the hassle of rolling out dough? These Cherry Pie Bars deliver all the flavors of a classic cherry pie in an easy-to-make bar form. Featuring a buttery shortbread crust, juicy cherry filling, and a golden crumb topping, this dessert is simple, delicious, and perfect for sharing. Whether for a family gathering, holiday celebration, or an afternoon treat, these bars will quickly become a go-to favorite!
Ingredients
1cup unsalted butter (softened)
1cup granulated sugar
1/2tsp salt
1tsp vanilla extract
2cups all-purpose flour (sifted)
1can (21 oz) cherry pie filling
1/2cup powdered sugar (for glaze)
1tbsp milk (for glaze)
Instructions
1
Preheat the Oven
Before you get started, set your oven to 350°F (175°C) so it’s nice and hot when your bars are ready to bake. Line a 9x13-inch baking dish with parchment paper for easy removal, or lightly grease it to keep everything from sticking.
2
Make the Dough
In a large mixing bowl, beat the softened butter and sugar together using an electric mixer. Mix for about 2-3 minutes until the texture becomes light and fluffy. Add in the vanilla extract and a pinch of salt, and mix again until fully incorporated.
3
Add the Flour
Slowly stir in the all-purpose flour, blending just until the dough starts to come together. It should have a crumbly texture but still hold its shape when pressed between your fingers.
4
Form the Crust
Take about two-thirds of the dough and press it evenly into the bottom of your prepared baking dish. Make sure to press it firmly and evenly to create a stable base.
5
Spread the Cherry Filling
Spoon the cherry pie filling over the crust, making sure to spread it all the way to the edges. This ensures that every bite has that perfect balance of buttery crust and sweet, tangy cherry goodness.
6
Make the Crumble Topping
With the remaining one-third of the dough, use your hands to crumble it over the cherry filling. Leave some larger chunks for a textured, bakery-style topping.
7
Bake to Perfection
Place the baking dish in your preheated oven and let the bars bake for about 35 minutes. You’ll know they’re ready when the top is lightly golden brown and the cherry filling is bubbling along the edges.
8
Cool Before Glazing
Once baked, remove the dish from the oven and let the bars cool for at least 15 minutes in the pan. This will help them set, making them easier to slice later.
9
Make the Glaze
While the bars are cooling, whisk together powdered sugar and milk in a small bowl until smooth. If the glaze feels too thick, add a few more drops of milk until you reach your desired consistency.
10
Drizzle the Glaze
Once the bars have cooled down, drizzle the glaze over the top using a spoon or a small piping bag. Let it sit for a few minutes so it can set properly.
11
Slice & Serve
Cut the bars into squares or rectangles, depending on your preference. These taste amazing warm, at room temperature, or even chilled from the fridge.
Nutrition Facts
Servings 12
Amount Per Serving
Calories310kcal
% Daily Value *
Total Fat15g24%
Saturated Fat9g45%
Trans Fat0.5g
Cholesterol40mg14%
Sodium120mg5%
Potassium55mg2%
Total Carbohydrate41g14%
Dietary Fiber1g4%
Sugars22g
Protein2.5g5%
* Percent Daily Values are based on a 2,000 calorie diet. Your daily value may be higher or lower depending on your calorie needs.
Note
For a Crispier Crust
If you prefer a firmer, less soft base, pre-bake the crust for 8-10 minutes before adding the cherry filling. This prevents it from absorbing too much moisture during baking.
Making Homemade Cherry Filling
Want to skip the canned filling? No problem! You can easily make your own by cooking 2 cups of pitted cherries with ½ cup sugar and 1 tablespoon cornstarch over medium heat. Stir occasionally until the mixture thickens, then let it cool before using.
Chilling the Dough for Better Texture
If your dough is too soft or sticky to work with, pop it in the fridge for 10-15 minutes before pressing it into the pan. This will help make the crust firmer and easier to handle.
Getting Clean, Perfect Slices
For neater slices, refrigerate the bars for at least 30 minutes before cutting. This helps the filling set properly and prevents it from spilling out when you slice.
How to Store Cherry Pie Bars
At Room Temperature: Store in an airtight container for up to 2 days.
In the Refrigerator: Keep them fresh in the fridge for up to 5 days.
Freezing: Wrap each bar individually in plastic wrap, place them in an airtight container, and freeze for up to 3 months. Let them thaw at room temperature before serving.
Fun Variations to Try
Alternative Glaze: Instead of the classic powdered sugar glaze, try a drizzle of melted white chocolate or a light dusting of powdered sugar.
Add Some Crunch: Mix in chopped almonds, pecans, or walnuts into the crumble topping before baking for extra texture.
Switch Up the Fruit: Swap out the cherry filling for blueberry, raspberry, or apple pie filling for a fun twist.
These Cherry Pie Bars are buttery, fruity, and so easy to make—a perfect dessert for any occasion. Enjoy every bite!
Did you make this recipe?
Follow @velvetyrecipes on Instagram for more recipes.
Pin this recipe to share with your friends and followers.
Talia
Chef-Inspired Recipes for Home Cooks
My name is Talia, and I’m the heart and hands behind this blog. As a professional chef with years of experience in the kitchen, I created Velvety Recipes as a space to share my love for food, cooking, and the art of crafting delicious meals that are simple yet elegant.
Thank you for your support! We truly appreciate your time and effort. If you have any questions or need further assistance, feel free to reach out. Have a wonderful day!