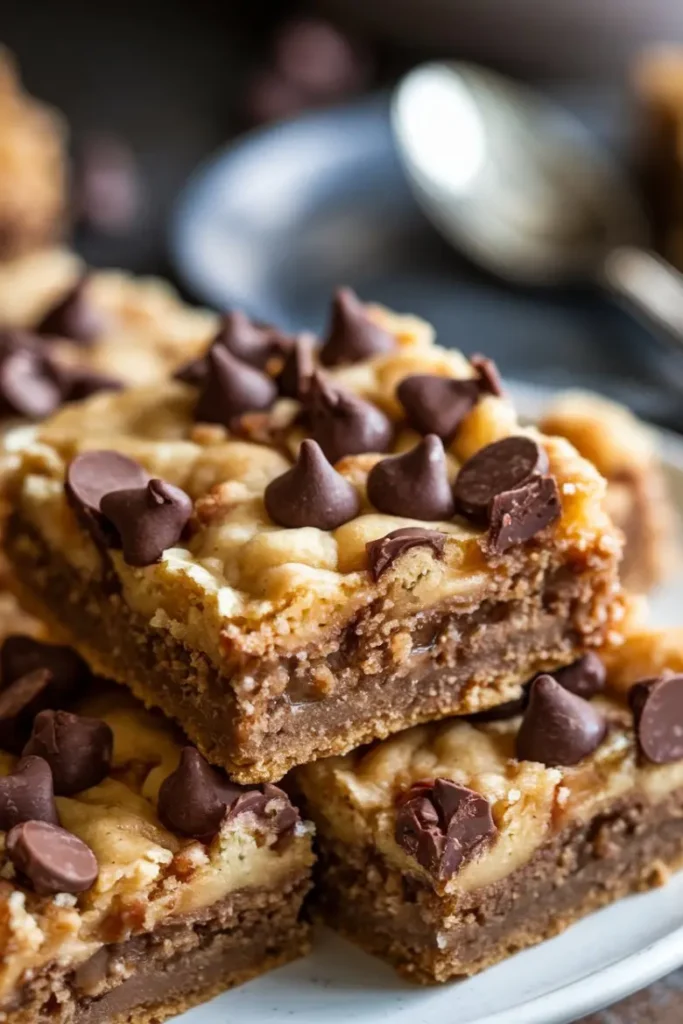
Congo Bars Recipe: The Best Gooey, Chewy, and Irresistible Treat
There’s a quiet kind of magic in recipes that ask for almost nothing and give you everything. Congo Bars are that recipe for me. No mixers, no elaborate techniques—just a bowl, a spoon, and a few pantry staples that somehow bake into something way more special than they have any right to be. I’ve made them in tiny apartments, late at night, half-asleep, and they’ve still come out golden and glorious. They don’t ask for perfection—just a little mixing and a hot oven.
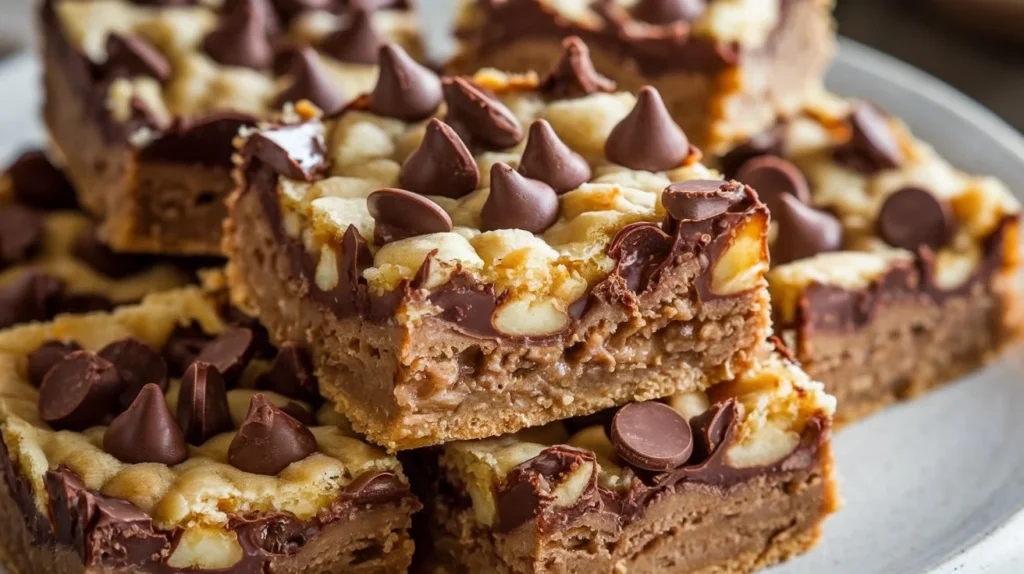
What really gets me is how these bars bring people together. I’ve taken them to book clubs, potlucks, last-minute dinner parties, and even family gatherings where everyone brings “their thing.” And still, it’s always these humble squares that vanish first. The chewy center, the crisp edges, that hit of melty chocolate—it’s comfort in every bite. They don’t try to impress with layers or frosting, yet somehow, they do.
Whenever I need something guaranteed to please but I’m short on time or energy, Congo Bars are what I reach for. They’re forgiving, foolproof, and endlessly adaptable. But more than that, they’ve become part of my story—my go-to dessert that never fails to show up when I need a win in the kitchen. And if you’re anything like me, you’ll bake them once and never stop.
Why You’ll Love This Recipe
Congo Bars are a dessert dream come true! They’re incredibly simple to make, even for beginners, and use basic ingredients you likely already have in your pantry. These bars are wonderfully chewy, gooey, and bursting with chocolate in every bite. Their rich, caramel-like flavor makes them a favorite for any occasion—be it a casual gathering, potluck, or a relaxing evening at home. Even better, they’re budget-friendly and endlessly versatile. Whether you want to add nuts, swap in different chocolate chips, or top them with a creative twist, these bars can easily be customized to suit your taste.
Key Ingredients and Substitutions
Here’s a breakdown of the key components and how you can adapt them to your liking:
Butter: Melted butter gives these bars their rich and moist texture. If using salted butter, just reduce the salt in the recipe.
Brown Sugar: The star ingredient for that chewy texture and deep flavor. Either light or dark brown sugar works well here.
Eggs: These provide structure and moisture. For a plant-based option, replace them with flax eggs or applesauce.
Vanilla Extract: Enhances the overall flavor with a subtle sweetness.
Flour: All-purpose flour works best, but you can use gluten-free flour for a dietary-friendly version.
Baking Powder: Helps create a soft and tender texture by giving the bars a slight rise.
Salt: Balances out the sweetness and enhances the flavor.
Chocolate Chips: Semi-sweet chocolate chips are a classic choice, but you can get creative with white chocolate, dark chocolate, or butterscotch chips.
How to Make Congo Bars (Step-by-Step)
Follow these easy steps for perfectly gooey Congo Bars:
Prepare Your Pan: Preheat your oven to 350°F (175°C). Line a 9x13-inch pan with parchment paper or grease it lightly.
Melt the Butter: Gently melt the butter on the stovetop or in the microwave. Allow it to cool slightly before mixing.
Mix Wet Ingredients: Combine the melted butter and brown sugar in a large bowl until smooth. Add eggs one at a time, mixing well after each addition. Stir in the vanilla extract.
Combine Dry Ingredients: In a separate bowl, whisk together the flour, baking powder, and salt.
Mix Wet and Dry: Gradually fold the dry ingredients into the wet mixture. Avoid overmixing to maintain a soft texture.
Add Chocolate Chips: Stir in most of the chocolate chips, saving a few to sprinkle on top before baking.
Bake: Spread the batter evenly in the prepared pan. Bake for 25–30 minutes, or until the edges are golden and a toothpick inserted in the center comes out with a few moist crumbs.
Cool and Slice: Let the bars cool in the pan for about 15 minutes before slicing. For clean cuts, allow them to cool completely.
Tips for the Best Results
Measure Correctly: Use accurate measurements to avoid dry or overly gooey bars.
Don’t Overmix: Stir until just combined to keep the texture light and tender.
Customize Baking Time: Bake shorter for gooey bars and longer for firmer ones, keeping an eye on them towards the end.
Room Temperature Eggs: Ensure eggs are at room temperature for smoother blending.
Fun Variations
These bars are highly adaptable! Try these ideas to make them unique:
Add Nuts: Toss in walnuts, pecans, or almonds for extra crunch.
Dried Fruits: Mix in raisins, cranberries, or shredded coconut for added flavor.
Candy Pieces: Fold in chopped candy bars like Reese’s or M&Ms for a fun twist.
Vegan Option: Use vegan butter, flax eggs, and dairy-free chocolate chips for a plant-based version.
Storing and Reheating
At Room Temperature: Store in an airtight container for up to 5 days.
In the Fridge: Keep refrigerated for up to 10 days. Bring them to room temperature before serving for the best texture.
Freezing: Wrap bars individually in plastic wrap and freeze for up to 3 months. Thaw at room temperature or reheat in the microwave for 15–20 seconds.
Serving Ideas
With Ice Cream: Warm up a bar and enjoy it with a scoop of your favorite ice cream.
Drizzled Toppings: Top with melted chocolate or caramel for added indulgence.
Pair with Drinks: Enjoy these bars with coffee, tea, or even a cold glass of milk.
Why You’ll Make These Again
Congo Bars are a guaranteed crowd-pleaser. Their chewy texture, rich flavor, and easy preparation make them a recipe you’ll return to time and again. Plus, their adaptability ensures there’s always room to get creative. Whether you’re hosting a party, sharing a treat with loved ones, or satisfying your sweet tooth, these bars are sure to impress. Give them a try—you won’t regret it!
Congo Bars are a chewy, buttery dessert loaded with chocolate chips and a hint of vanilla, making them the ultimate treat for any occasion. These bars are quick to make, full of flavor, and a guaranteed crowd-pleaser!
Ingredients
1cup Unsalted butter (Melted and slightly cooled)
2cups Brown sugar (Packed)
3 Large eggs (Room temperature)
1tsp Vanilla extract (Pure, for best flavor)
2cups All-purpose flour (Sifted)
1tsp Baking powder
1/2tsp Salt (Enhances flavor)
1.5cups Semi-sweet chocolate chips
Instructions
1
Get Your Oven Ready:
Preheat your oven to 350°F (175°C). Prepare a 9x13-inch baking dish by either lining it with parchment paper or greasing it lightly with butter or non-stick spray. This step ensures that your Congo Bars will lift out smoothly without sticking to the pan.
2
Cream the Butter and Sugar:
In a large mixing bowl, stir together the melted butter and brown sugar. Use a whisk or wooden spoon and mix until the texture is creamy and smooth. This mixture is the foundation of the bars, giving them their rich, caramel-like flavor.
3
Add the Eggs and Vanilla:
Crack the eggs into the butter-sugar mixture, one at a time, mixing well after each one. Stir in the vanilla extract to enhance the flavor profile. By now, the batter should be silky and glossy, setting the stage for the perfect Congo Bars.
4
Prepare the Dry Ingredients:
In a separate bowl, whisk together the flour, baking powder, and salt. Sifting the flour ensures a lump-free mixture and helps everything combine more evenly.
5
Combine Wet and Dry Mixtures:
Gradually add the dry ingredients to the wet mixture. Gently fold everything together with a spatula or wooden spoon, mixing just until the batter comes together. Overmixing here could result in bars that are tough rather than tender.
6
Add the Chocolate Chips:
Fold in the chocolate chips gently, making sure they’re evenly spread throughout the batter. If you’d like an extra touch, save a small handful to sprinkle over the top before baking for a decorative finish.
7
Pour and Smooth:
Pour the batter into the prepared baking dish and spread it out evenly using a spatula. Make sure the surface is smooth so the bars bake uniformly.
8
Bake to Perfection:
Place the dish in the preheated oven and bake for 25–30 minutes. Keep an eye on the bars—they should be golden brown around the edges, and when you insert a toothpick into the center, it should come out with just a few moist crumbs (not raw batter).
9
Cool Completely:
Take the baking dish out of the oven and let the bars cool in the pan for about 10 minutes. For clean, precise slices, wait until they’re completely cool before cutting into squares or rectangles.
Nutrition Facts
Servings 16
Amount Per Serving
Calories285kcal
% Daily Value *
Total Fat15g24%
Saturated Fat9g45%
Trans Fat0.5g
Cholesterol55mg19%
Sodium120mg5%
Potassium90mg3%
Total Carbohydrate36g12%
Dietary Fiber1g4%
Sugars26g
Protein3g6%
* Percent Daily Values are based on a 2,000 calorie diet. Your daily value may be higher or lower depending on your calorie needs.
Note
Avoid Overmixing: When combining the dry ingredients with the wet, mix gently and stop as soon as everything is combined. Overmixing can lead to tough or dense bars.
Go for Gooey: If you’re a fan of super gooey bars, bake them for closer to 25 minutes rather than 30. Slightly underbaking gives you that soft, chewy center that melts in your mouth.
Experiment with Chocolate: While semi-sweet chocolate chips are classic, you can switch things up by using dark chocolate, white chocolate, or even butterscotch or peanut butter chips for a unique twist.
Add a Crunch: Want more texture? Fold in some chopped nuts like walnuts, pecans, or almonds. Toasting the nuts beforehand will give them a deeper, richer flavor.
Room-Temperature Eggs Matter: Let your eggs come to room temperature before mixing them into the batter. This small step ensures a smoother batter and an even bake.
Check Your Oven: If your bars come out over- or underbaked, your oven temperature might be off. Use an oven thermometer to double-check the accuracy.
Finish with Style: For a fancy finish, drizzle melted chocolate or caramel over the cooled bars. A sprinkle of flaky sea salt on top can add a sophisticated touch and balance out the sweetness beautifully.
Did you make this recipe?
Follow @velvetyrecipes on Instagram for more recipes.
Pin this recipe to share with your friends and followers.
Talia
Chef-Inspired Recipes for Home Cooks
My name is Talia, and I’m the heart and hands behind this blog. As a professional chef with years of experience in the kitchen, I created Velvety Recipes as a space to share my love for food, cooking, and the art of crafting delicious meals that are simple yet elegant.
Thank you for your support! We truly appreciate your time and effort. If you have any questions or need further assistance, feel free to reach out. Have a wonderful day!