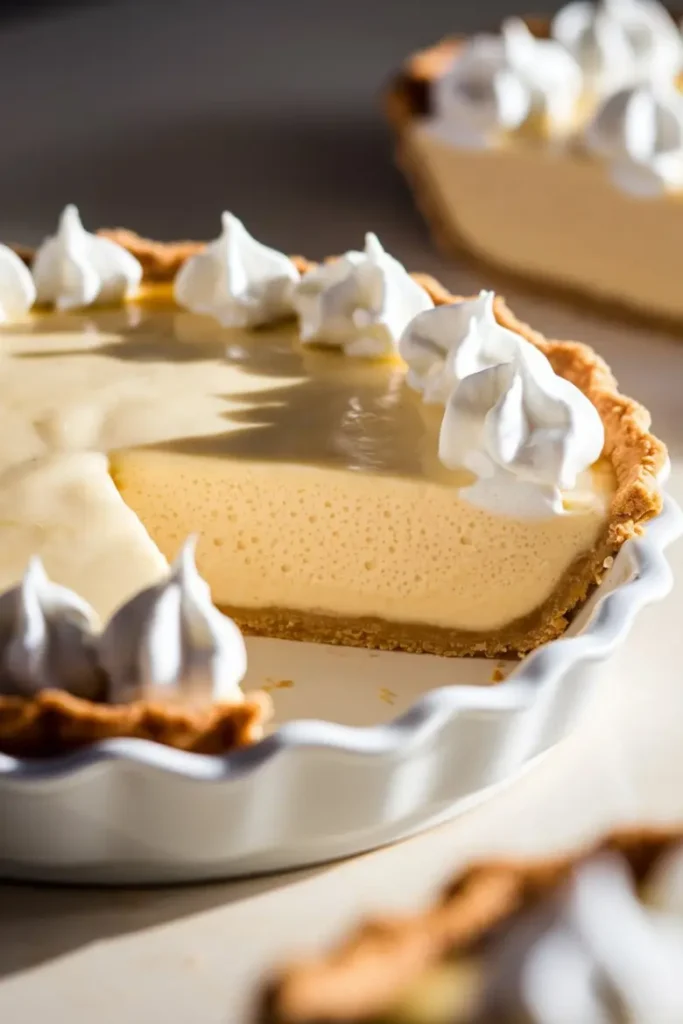
Every time I pull this Cream Cheese Pie from the fridge, it feels like flipping back to a quieter time in our family kitchen. My mom never gave it a proper name—just called it “that cream pie” she’d whip up when guests were expected or when we had an extra block of cream cheese lying around. She didn’t make a big deal out of it, never wrote the recipe down, never treated it like anything more than second nature. I still see her standing there, one hand stirring, the other wrapped around a mug of coffee, chatting about nothing in particular while the pie came together almost by instinct. It wasn’t flashy, but it always had this way of making people stop and ask, “Wait—what is this?”
Isn’t it funny how the simplest things stick with you? No fancy equipment, no special tricks—just a golden graham cracker crust and a smooth, barely-sweet filling that tastes like comfort itself. It’s the kind of dessert that slips into your life without fanfare but earns a permanent spot because it always delivers. Cool, creamy, and quietly nostalgic—this pie holds onto memory the way vanilla clings to warm cream cheese.
I’ve made this pie more times than I can count—for birthdays, holidays, rainy afternoons, and those midweek evenings when something sweet just feels necessary. Sometimes I dress it up with fruit, other times a bit of chocolate, and occasionally, I leave it just as it was in my childhood: plain and perfect. And no matter how I serve it, it always disappears before I get to sneak a second slice.
So if you’re in need of a dessert that’s easy on effort but rich in feeling, this Cream Cheese Pie might be just the one. It’s simple, sure—but it’s the kind of simple that stays with you.
Why You’ll Love This Cream Cheese Pie
This pie is one of those desserts that quietly steals the show. It’s not complicated, doesn’t require special tools, and yet it feels like something you'd get at a cozy neighborhood café. Here’s why it’s a favorite in so many homes.
It’s Simple, but Feels Special
No water baths, no springform pans, no fuss. Just a straightforward recipe that gives you the same creamy, rich texture you’d expect from a traditional cheesecake.
Easily Customizable
Serve it plain or dress it up with fresh fruit, chocolate, or crumbled cookies. It works for casual get-togethers, holiday meals, or anything in between.
Great for Making Ahead
This pie actually gets better as it rests in the fridge. Make it the night before and save yourself time on the day you’re serving it.
Always a Crowd Favorite
It’s rich but not too heavy, sweet but not overwhelming. Even people who don’t usually go for dessert end up reaching for a second slice.
No Experience Needed
This recipe is easy enough for beginners but the result tastes like something you'd find in a bakery. Just follow the simple steps and you’ll have a smooth, creamy pie ready to go.
Key Ingredients and Easy Substitutions
Cream Cheese
Use full-fat cream cheese in block form for the best texture. Tub versions or low-fat options can work, but the result won’t be quite as rich.
Sugar
Just enough to balance the tang of the cream cheese. Regular granulated sugar works great, or you can use coconut sugar for a deeper flavor.
Vanilla Extract
Adds warmth and depth. You can swap it for almond extract or add a bit of lemon zest for a fresh twist.
Eggs
Help bind the filling and give it a smooth, custard-like texture. Make sure they’re at room temperature so they blend in evenly.
Sour Cream (Optional but Recommended)
Adds extra creaminess and a slight tang that balances the sweetness. Plain Greek yogurt works well too.
Graham Cracker Crust
Buttery, crisp, and just sweet enough. If you don’t have graham crackers, try crushed digestive biscuits, vanilla wafers, or gingersnaps.
How to Make Cream Cheese Pie
1. Prepare the Crust
Crush graham crackers into fine crumbs. Mix with melted butter and sugar until it feels like wet sand. Press into a pie pan and prebake until golden.
2. Beat the Cream Cheese
Use a hand or stand mixer to beat the softened cream cheese until it’s completely smooth. This is key for a lump-free filling.
3. Add Sugar and Flavor
Beat in the sugar, vanilla, and a pinch of salt. If you're adding lemon zest or almond extract, mix it in now. Scrape the sides of the bowl to ensure everything is combined.
4. Add the Eggs
Mix in the eggs one at a time, just until incorporated. Don’t overmix—this can add too much air and lead to cracks while baking.
5. Fold in Sour Cream
If using, gently mix in the sour cream. It softens the texture and makes the pie even creamier.
6. Fill and Bake
Pour the filling into the cooled crust, smooth the top, and bake until the edges are set and the center still jiggles slightly.
7. Cool and Chill
Let the pie cool at room temperature, then refrigerate for at least 4 hours or overnight. It sets as it chills and slices beautifully once cold.
Tips for Success
Use room temperature ingredients for the smoothest filling.
Don’t overbake. A slight jiggle in the center means it’s done.
Chill thoroughly before serving. This improves both texture and flavor.
For clean slices, use a sharp knife dipped in hot water and wiped dry.
To avoid bubbles, gently tap the filled pie pan on the counter before baking.
Easy Variations
Fruit Topping: Add fresh berries, berry sauce, or canned pie filling on top after chilling.
Chocolate Swirl: Swirl in melted chocolate or Nutella before baking.
Citrus Version: Add lemon or orange zest to the filling and top with candied peel.
Crust Options: Swap the graham crackers for Oreos, chocolate cookies, or shortbread.
Mini Pies: Use a muffin tin for individual servings—great for parties or snacks.
Storing and Serving
Refrigerate
Store covered in the fridge for up to 5 days. The texture holds up well, making it perfect for leftovers.
Freeze
Wrap slices tightly in plastic wrap and foil, then freeze for up to 2 months. Thaw in the fridge overnight.
Reheat
It’s best served cold, but you can warm a slice in the microwave for about 10–15 seconds if desired.
How to Serve It
Keep it simple with a dollop of whipped cream and a few fresh berries.
Add a drizzle of fruit sauce for a more elegant presentation.
For holidays, top with cranberry sauce or pomegranate seeds.
Or just grab a slice straight from the fridge and enjoy it with a fork—no extras needed.
Final Thoughts
This Cream Cheese Pie is proof that simple desserts can still be incredibly satisfying. It’s creamy, comforting, and endlessly adaptable. Whether you’re new to baking or just looking for a go-to recipe you can rely on, this one delivers.
Make it once, and you’ll see why so many people keep coming back to it again and again.
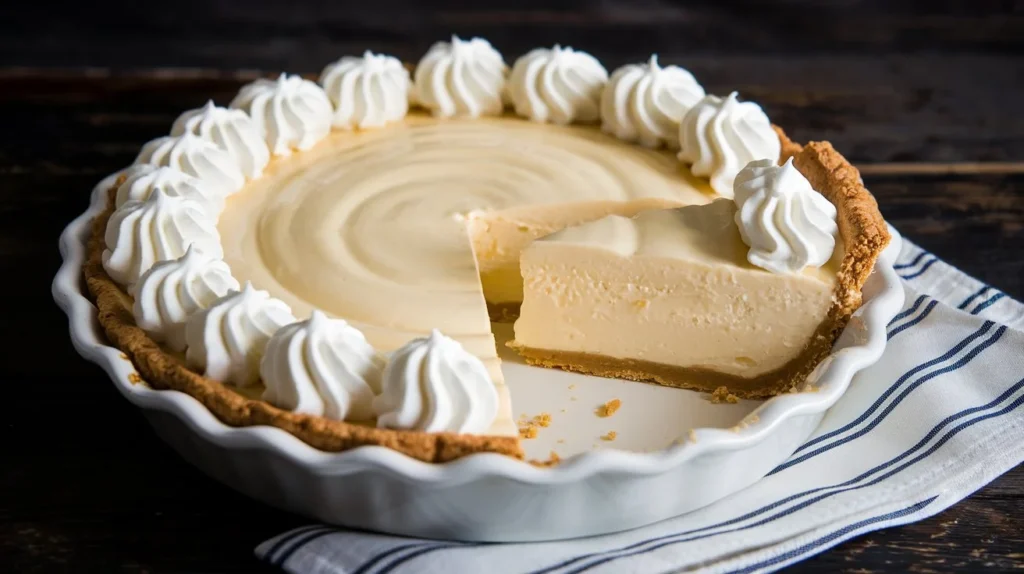
This Cream Cheese Pie is a rich and creamy dessert with a buttery graham cracker crust and smooth, slightly tangy filling. It comes together with simple ingredients and minimal effort, yet delivers a taste that’s elegant enough for special occasions. Whether topped with fresh fruit, chocolate, or served plain, this easy pie is always a showstopper.
Ingredients
1 ½cups graham cracker crumbs (about 12 full sheets)
⅓cup granulated sugar (for crust)
6tbsp unsalted butter (melted)
2packs cream cheese (8 oz each) (softened)
⅔cup granulated sugar (for filling)
2tsp vanilla extract
2large eggs (room temperature)
½cup sour cream (optional, for smoother texture)
1pinch salt (balances sweetness)
Instructions
1
Start with the crust:
Preheat your oven to 350°F (175°C) — getting the oven warm now gives you time to prep everything else. In a medium bowl, combine your graham cracker crumbs and a bit of granulated sugar. Give it a good stir so everything’s evenly mixed.
2
Press it into the pan:
Spoon the crumb mixture into a 9-inch pie pan. Using the bottom of a glass or a measuring cup, gently but firmly press the crumbs into an even layer across the bottom and up the sides. Try to make it nice and compact — a solid crust will hold together beautifully once the pie is sliced.
3
Bake the crust:
Pop the crust into your preheated oven and bake it for 8 to 10 minutes, just until it’s slightly golden and smells amazing. This quick bake not only brings out that nutty graham flavor but also keeps the crust from getting soggy later. Set it aside and let it cool completely before adding the filling.
4
Prepare the cream cheese filling:
In a large bowl, beat the softened cream cheese using a hand mixer or stand mixer on medium speed. Mix until it’s completely smooth—no lumps! Scrape down the sides of the bowl a couple of times to make sure everything gets blended well.
Add the sugar, vanilla extract, and a pinch of salt, and continue beating until the mixture turns silky and luscious.
5
Add the eggs and sour cream:
Now it’s time for the eggs. Crack them in one at a time, mixing on low speed just until each one is fully blended. Don’t rush or overbeat — we want the texture creamy, not airy. If you're using sour cream, gently fold it in at this stage. It gives the filling an extra velvety richness that’s hard to beat.
6
Assemble the pie:
Pour that dreamy filling into your cooled crust. Use a spatula to smooth the top, making sure it’s even. Then, gently tap the pie dish on your counter a few times to help release any trapped air bubbles.
7
Bake it gently:
Reduce your oven temperature to 325°F (163°C). Slide the pie onto the middle rack and bake for about 20–25 minutes. You’re looking for edges that are just set, with a center that still jiggles slightly when nudged. Don’t worry — that little wiggle means it’s just right and will firm up as it cools.
8
Cool it gradually:
Remove the pie from the oven and place it on a wire rack. Let it cool at room temperature for about an hour. This gentle cooling process helps prevent cracks and keeps the texture super creamy.
9
Chill to perfection:
Once it’s cooled, transfer the pie to the fridge. Chill it for at least 4 hours, or even better — overnight. This gives the filling time to firm up fully and lets all those flavors settle into rich, creamy harmony.
10
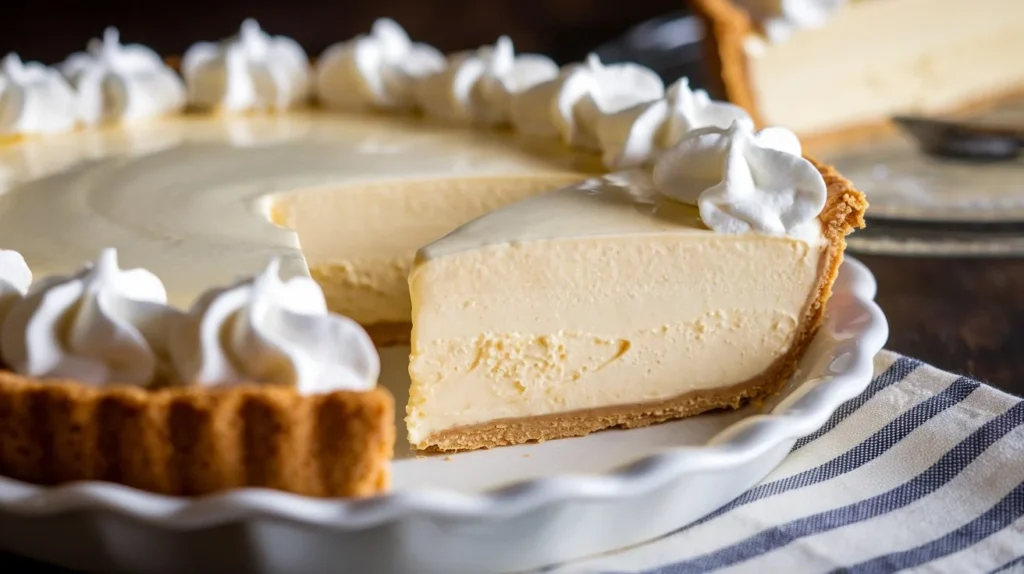
Serve and enjoy:
When it’s time to serve, use a sharp knife to slice cleanly through the pie. For the neatest cuts, dip the knife in hot water and wipe it dry between each slice. Serve it as-is or dress it up with a spoonful of fruit compote, a drizzle of chocolate, or a dollop of whipped cream. However you serve it, you're in for a real treat.
Nutrition Facts
Servings 8
Amount Per Serving
Calories410kcal
% Daily Value *
Total Fat29g45%
Saturated Fat16g80%
Cholesterol115mg39%
Sodium300mg13%
Potassium115mg4%
Total Carbohydrate30g10%
Sugars21g
Protein6g12%
* Percent Daily Values are based on a 2,000 calorie diet. Your daily value may be higher or lower depending on your calorie needs.
Note
Room temperature is key: Make sure your cream cheese, eggs, and sour cream are all at room temperature before mixing. Cold ingredients won’t blend well and can lead to a lumpy filling — not what we want!
Don’t overmix: It’s tempting to beat the filling until it’s fluffy, but resist the urge. Overmixing introduces air, which can cause the pie to puff up and crack as it bakes. Just mix until everything is smooth and combined.
Add your own twist: Want to switch it up? A splash of lemon juice and some zest adds a fresh citrusy brightness. Or swirl in fruit preserves, caramel, or even a bit of melted chocolate before baking for a gorgeous marbled look.
No sour cream? No worries. You can skip it for a firmer filling, or sub in some plain Greek yogurt if that’s what you’ve got on hand.
Prefer a no-bake version? You can skip baking the crust altogether — just chill it for 30 minutes before adding the filling, then refrigerate the whole pie for at least 6 hours. It won’t be quite as firm, but the flavor will still be amazing.
Serving tip: This pie tastes best cold, straight from the fridge. Want picture-perfect slices? Use a knife dipped in hot water, and wipe clean between cuts for sharp, clean edges.
Storage: Got leftovers? Store them covered in the fridge for up to 5 days. For longer storage, slice the pie and wrap each piece individually — you can freeze them for up to 2 months. Just thaw in the fridge when you’re ready to indulge again.
Did you make this recipe?
Follow @velvetyrecipes on Instagram for more recipes.
Pin this recipe to share with your friends and followers.
Talia
Chef-Inspired Recipes for Home Cooks
My name is Talia, and I’m the heart and hands behind this blog. As a professional chef with years of experience in the kitchen, I created Velvety Recipes as a space to share my love for food, cooking, and the art of crafting delicious meals that are simple yet elegant.
Thank you for your support! We truly appreciate your time and effort. If you have any questions or need further assistance, feel free to reach out. Have a wonderful day!