
Table of Contents
I didn’t grow up eating Hot Cross Buns. In fact, the first time I ever saw one was at my partner’s childhood Easter brunch, where the table was filled with food that carried stories I hadn’t heard yet. There was this basket of golden, glossy buns, each one marked with a pale cross on top and the faint scent of spice in the air. I remember how his mom gently broke one open and offered it to me like it was second nature—just something you do when food means love and history and care.
Later that year, I tried baking them myself. I was nervous, not about the recipe so much, but about whether I could capture that quiet meaning—the way food can say, “you’re home,” even if the recipe didn’t come from your own upbringing. My first batch was far from perfect: the crosses were a little crooked, a few raisins escaped from the sides, and I may have burned the bottoms just slightly. But when I pulled them out of the oven and brushed them with warm apricot jam, the smell was familiar. It reminded me of that brunch table, the soft clink of dishes, and the gentle laughter of a family I was learning to call my own.
Since then, these Hot Cross Buns have become a small but important part of our rhythm each spring. They aren’t just holiday buns anymore—they’re a reminder that food can bridge gaps, create new traditions, and tell stories you didn’t know you needed. Every time I bake them, I add something of my own: a touch more orange zest, a moment of quiet reflection, and the joy of watching my little family pull them apart with sticky fingers and content hearts.
Why You’ll Love This Recipe
There’s something magical about homemade Hot Cross Buns—from the rich, spiced aroma filling your kitchen to that first soft, buttery bite. Here’s why this recipe will become a favorite:
- Better Than Store-Bought – Forget the dry, overly sweet supermarket versions. These buns are fresh, fluffy, and packed with real flavor.
- Perfectly Spiced & Sweetened – A balanced blend of cinnamon, nutmeg, and cloves brings warmth, while dried fruit and a hint of citrus create a naturally sweet contrast.
- Soft and Pillowy Texture – The dough is enriched with butter and eggs, making each bite light, tender, and melt-in-your-mouth delicious.
- Versatile & Customizable – Whether you love traditional raisins or prefer chocolate chips or nuts, this recipe can be easily adapted to suit your taste.
- Ideal for Any Occasion – Traditionally enjoyed during Easter, but honestly, they’re too good to limit to just one season. Enjoy them for breakfast, brunch, or an afternoon treat.
Key Ingredients and Substitutions
Every ingredient in these Hot Cross Buns plays a role in flavor and texture. Here’s what you need and how you can switch things up:
- All-Purpose Flour – This is the base of your buns, providing structure. If you want a healthier twist, replace 1 cup with whole wheat flour, but don’t swap it all, or your buns might be too dense.
- Active Dry Yeast – The key to fluffy, well-risen buns. If using instant yeast, you can skip the activation step and mix it directly with the flour.
- Milk – Adds richness and softness. You can use whole milk, plant-based milk (almond, oat), or even buttermilk for extra tenderness.
- Granulated Sugar – Gives a slight sweetness to the dough. Swap with brown sugar for a deeper caramelized flavor.
- Egg – Helps bind the dough and makes the buns soft. If you need an egg-free version, try a flax egg (1 tbsp flaxseed + 3 tbsp water).
- Unsalted Butter – Adds richness and flavor. You can use margarine or a plant-based butter alternative if needed.
- Cinnamon, Nutmeg, Cloves – The heart of that classic hot cross bun flavor. You can tweak the spice levels or add cardamom or ginger for a twist.
- Raisins or Currants – These add bursts of sweetness. If you’re not a fan, try cranberries, chopped apricots, or even chocolate chips.
- Orange Zest – A subtle citrusy freshness that lifts the spices. You can also use lemon zest or skip it if you prefer.
- Apricot Jam – Used for the glaze. Swap with honey, maple syrup, or a simple sugar syrup.
How to Make Hot Cross Buns (Step-by-Step)
Making Hot Cross Buns from scratch is easier than you think! Here’s a breakdown of every step:
1. Activate the Yeast
Warm the milk and mix it with sugar and yeast. Let it sit until it turns foamy—this means your yeast is alive and working!
2. Make the Dough
Mix the dry ingredients, then add the wet ones, including the frothy yeast mixture. Stir until it comes together, then knead until smooth and elastic.
3. Add the Fruits and Zest
Gently knead in the raisins and orange zest, making sure they’re evenly distributed.
4. First Rise
Cover the dough and let it rest until it doubles in size. This gives the yeast time to work its magic.
5. Shape the Buns
Divide the dough into equal portions and roll them into balls. Place them on a lined baking tray, leaving space between them.
6. Second Rise
Let the shaped buns rise again until they puff up. This second proofing gives them a lighter texture.
7. Pipe the Cross
Mix flour and water into a thick paste and pipe crosses over the buns.
8. Bake
Bake until golden brown and beautifully risen.
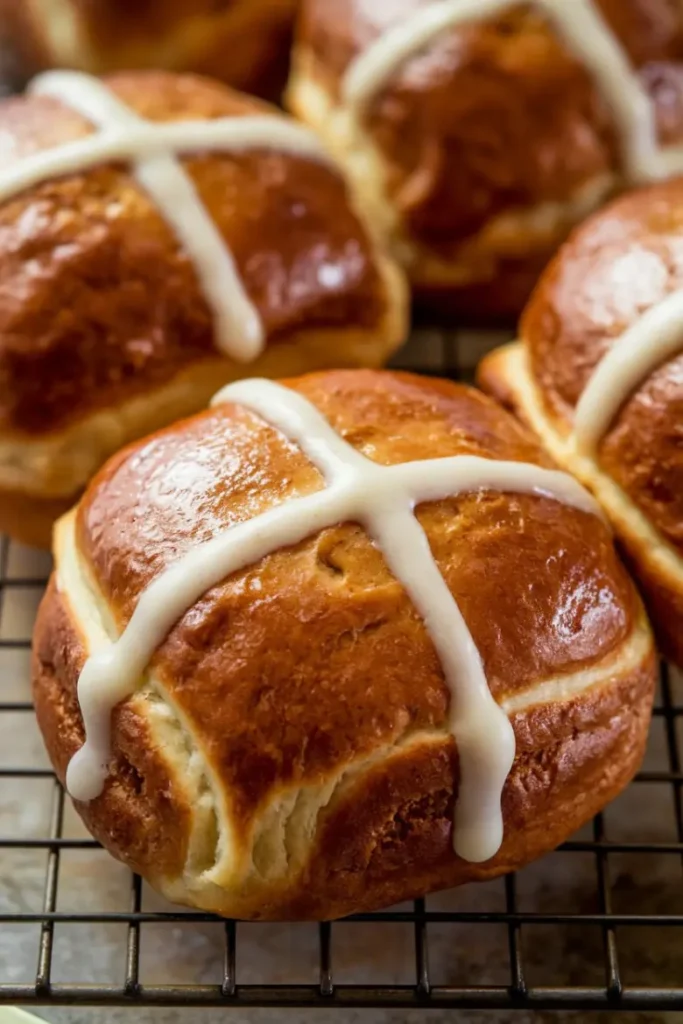
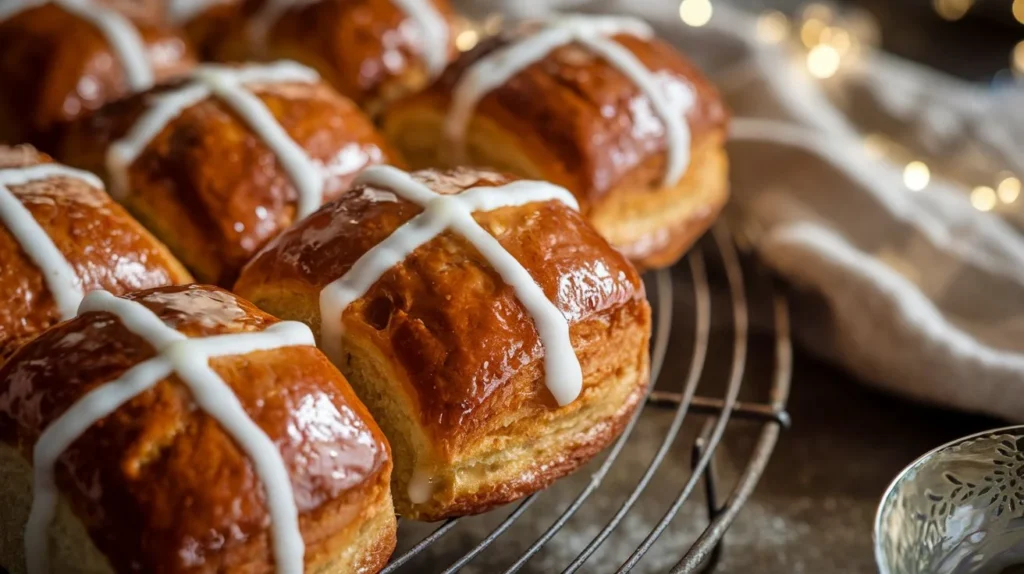
9. Glaze for Perfection
Brush the warm buns with apricot jam for a glossy, slightly sticky finish.
10. Enjoy!
Let them cool slightly (if you can wait!) and serve with butter or jam.
Expert Tips for Success
- Use Fresh Yeast – If your yeast doesn’t foam up during activation, it’s probably expired. Start over with a fresh packet.
- Don’t Overload on Flour – The dough should be soft and slightly sticky. Adding too much flour will make the buns dry.
- Room Temperature Ingredients – Using warm milk and softened butter helps the dough rise better.
- Be Patient with Rising – A slow, steady proofing process creates the best texture. If your kitchen is cold, place the dough near a warm oven.
Variations and Customizations
Want to get creative? Try these fun variations:
- Chocolate Chip Hot Cross Buns – Replace raisins with chocolate chips for a sweeter version.
- Nutty Buns – Add chopped pecans or walnuts for extra crunch.
- Gluten-Free Option – Use a gluten-free flour blend and add 1 teaspoon xanthan gum to help with elasticity.
- Vegan Version – Swap butter for plant-based butter, use a flax egg, and replace milk with almond or soy milk.
Storage and Reheating Instructions
- Room Temperature: Keep in an airtight container for up to 3 days.
- Freezing: Wrap individually in plastic wrap and store in a ziplock bag in the freezer for up to 3 months.
- Reheating: Warm in a 300°F oven for 5-7 minutes or pop in the toaster for a slightly crispy edge.
Serving Suggestions
- Classic Buttered – The simplest and best way to enjoy them!
- With Jam or Honey – Try them with strawberry jam, apricot preserves, or a drizzle of honey.
- Toasted & Topped – Slice in half, toast, and top with cream cheese, nut butter, or a dusting of cinnamon sugar.
- With Tea or Coffee – These buns pair beautifully with a cup of Earl Grey or a cappuccino.
Summary and Encouragement
Baking Hot Cross Buns at home is a tradition worth keeping. It’s not just about the final product—it’s about the experience of kneading, rising, and filling your home with that irresistible aroma. Whether you make them for Easter or a cozy weekend breakfast, this recipe will never fail you.
So, grab your ingredients, get your hands a little floury, and enjoy the process. The result? Soft, spiced, golden-brown buns that taste like pure comfort.
Hot Cross Buns Recipe – Soft, Spiced & Perfectly Sweet
Description
These homemade Hot Cross Buns are the perfect balance of warm spices, citrus zest, and chewy dried fruit, all wrapped in a soft, fluffy bun with a golden-brown crust. Unlike store-bought varieties, these buns have a rich depth of flavor and an irresistibly light texture. The dough is infused with cinnamon, nutmeg, and cloves, while plump raisins and a hint of orange zest add bursts of natural sweetness. Finished with a signature flour cross and a glossy apricot glaze, these buns are ideal for Easter celebrations, afternoon tea, or a comforting breakfast treat.
Ingredients
For the Cross:
For the Glaze:
Instructions
-
Step 1: Activate the Yeast
Start by warming up the milk—it should be warm, not hot, about the temperature of a soothing bath. Stir in the sugar and yeast, then let it sit for 5–10 minutes. If you see bubbles and foam forming on the surface, that means your yeast is alive and ready to work its magic. If nothing happens, your yeast might be expired, so try again with a fresh batch.
-
Step 2: Mix the Dry Ingredients
In a large bowl, whisk together the flour, cinnamon, nutmeg, cloves, and salt. This step makes sure all the flavors are evenly mixed so every bite tastes just right.
-
Step 3: Bring the Dough Together
Pour the melted butter, beaten egg, vanilla extract, and the foamy yeast mixture into the dry ingredients. Stir everything together with a wooden spoon, or use a stand mixer with a dough hook if you have one. The dough will start coming together, but it’ll be a little sticky at first—that’s completely normal.
-
Step 4: Knead the Dough
Turn the dough onto a lightly floured surface and knead it for about 8–10 minutes, or until it feels smooth and elastic. If you’re using a stand mixer, knead it on medium speed for 5–7 minutes. The dough should feel slightly sticky but still easy to work with. If it sticks too much, sprinkle in a little flour, one tablespoon at a time.
-
Step 5: Add the Fruit and Zest
Drain the raisins or currants if you soaked them (which helps keep them soft), and pat them dry. Knead them into the dough along with the orange zest, making sure they’re evenly spread so every bun gets a bit of fruity goodness.
-
Step 6: First Rise (Proofing)
Place the dough in a greased bowl, cover it with a clean kitchen towel or plastic wrap, and let it rise in a warm, draft-free spot for about an hour, or until it doubles in size. If your kitchen is chilly, you can turn your oven on for a minute, then turn it off and place the dough inside to help it rise faster.
-
Step 7: Shape the Buns
Once the dough has risen, gently press it down to release any air bubbles. Divide it into 12 equal portions and roll each into a smooth ball. Arrange them on a lined baking sheet, leaving about an inch of space between them so they have room to expand.
-
Step 8: Second Rise
Cover the shaped buns with a towel or plastic wrap and let them rise again for another 30–45 minutes, or until they puff up and almost touch each other.
-
Step 9: Make the Cross Paste
Mix ½ cup of flour with 5–6 tablespoons of water until you have a thick but pipeable paste. Adjust with a little more water or flour if needed. Transfer the paste to a piping bag (or a small plastic bag with the tip cut off).
-
Step 10: Pipe the Crosses
Carefully pipe straight lines across the buns, first in one direction, then the other, to form the traditional cross.
-
Step 11: Bake Until Golden
Preheat your oven to 375°F (190°C) and bake the buns for 18–20 minutes, or until they turn a beautiful golden brown and sound hollow when tapped on the bottom.
-
Step 12: Add the Glaze
While the buns are still warm, heat up some apricot jam until it’s thin and runny. Strain out any fruit bits, then brush the jam over the tops of the buns to give them a lovely shine. If you don’t have apricot jam, honey, maple syrup, or even a light sugar syrup will work too.
-
Step 13: Cool and Enjoy
Let the buns cool slightly before digging in. They taste best fresh and warm, with a little butter or jam spread on top.
Nutrition Facts
Servings 12
- Amount Per Serving
- Calories 210kcal
- % Daily Value *
- Total Fat 7g11%
- Saturated Fat 4g20%
- Cholesterol 25mg9%
- Sodium 150mg7%
- Potassium 90mg3%
- Total Carbohydrate 34g12%
- Dietary Fiber 1.2g5%
- Sugars 10g
- Protein 4g8%
* Percent Daily Values are based on a 2,000 calorie diet. Your daily value may be higher or lower depending on your calorie needs.
Note
Getting the Yeast Right
- The milk should be warm but not too hot—around 110°F (43°C) is perfect. Too hot, and it kills the yeast; too cold, and the yeast won’t activate.
- If the yeast doesn’t foam up in 5–10 minutes, it’s probably inactive. Try again with fresh yeast.
Dough Consistency
- The dough should be slightly sticky but easy to handle. If it’s too dry, the buns might end up dense instead of soft and fluffy.
- If you want a heartier texture, swap out 1 cup of all-purpose flour for whole wheat flour.
Customizing the Flavor
- Feel free to adjust the cinnamon and nutmeg to your taste.
- Want a deeper sweetness? Swap white sugar for brown sugar.
Fruit Options
- Soaking the raisins or currants in warm water or orange juice keeps them from drying out during baking.
- Try different dried fruits like cranberries, chopped dates, or apricots for a twist.
Alternative Cross and Glaze Ideas
- No piping bag? No problem—just use a ziplock bag with a tiny hole cut in the corner.
- Some people prefer a sugar icing cross instead of the flour paste. If you’d like to try this, mix powdered sugar with a little milk and pipe it on after baking instead.
- Apricot jam gives the buns a classic shine, but honey, maple syrup, or a simple sugar syrup work just as well.
Storage and Reheating
- Keep the buns in an airtight container at room temperature for up to 3 days.
- To freeze, wrap each bun individually and store for up to 3 months.
- When ready to eat, reheat in the oven at 300°F (150°C) for 5–7 minutes.
- For extra flavor, slice and toast them before spreading on butter or jam.