Strawberry Cream Cheese Chill Pie (No Bake, Easy & Delicious)
Every year, when the first baskets of bright red strawberries show up at the farmers market, I feel this quiet urgency to slow down and savor the season. There’s just a short window when strawberries are at their sweetest—sun-warmed, juicy, and impossibly fragrant. When I was little, my mom and I had this unspoken ritual: we’d wake up early on the first sunny Saturday in May and head straight to the pick-your-own fields just outside town. I’d eat more berries than I put in the bucket, of course, and by the time we got home, our kitchen smelled like summer itself.
That afternoon, while I washed the berry juice off my fingers, she would whip up her famous Strawberry Cream Cheese Chill Pie. It wasn’t fancy—no gelatin tricks, no complicated layers—but it was always cool, creamy, and delicious in that way only something made with care can be. She’d spread the cream cheese filling into a homemade graham cracker crust, layer it with fresh strawberry slices, and spoon over a shiny jam glaze that made it look like it came from a bakery window. We’d chill it for hours, torturously waiting, before slicing it into perfect wedges that collapsed just slightly on the plate.
Now, years later, it’s the recipe I turn to when I want something that tastes like comfort and sunshine. It’s easy enough to throw together on a weeknight but special enough to bring to a gathering. And the best part? It doesn’t need an oven, just a little patience and a whole lot of love. Whether you're carrying on a tradition or starting your own, this pie has a way of turning ordinary days into memory-makers.
Why You’ll Love This Recipe
This no-bake pie has all the charm of an old favorite with none of the fuss. It’s cool and creamy, with a light, smooth filling that melts the moment it hits your tongue. And because it’s made with real strawberries, it feels fresh and naturally sweet—like summer in every bite. You don’t need an oven or special tools, and the steps are simple enough to follow even when you’re short on time. Whether you’re prepping dessert for a family gathering or just want something sweet on a warm afternoon, this pie is the kind of treat that quietly steals the show.
Key Ingredients and Substitutions
Cream Cheese: Full-fat gives the filling its rich, silky base. Reduced-fat works too, but steer clear of fat-free—it doesn’t blend well and tends to taste flat.
Whipped Topping: This keeps the pie filling soft and fluffy. If you’d rather use homemade whipped cream, go for it—just beat heavy cream with a bit of powdered sugar to make it stable.
Graham Cracker Crust: Making your own gives better flavor and crunch, but a store-bought crust works just fine. You can even swap in crushed vanilla wafers or digestive biscuits if that’s what you have on hand.
Fresh Strawberries: The real star here. Use fresh, firm berries so you get clean slices and bright, juicy flavor. Frozen ones won’t hold up as well and tend to leak too much liquid.
Strawberry Jam: A thin layer brushed on top gives the berries a pretty gloss and adds a touch of sweetness. You can also use raspberry or apricot preserves if you want something slightly different.
How to Make Strawberry Cream Cheese Chill Pie (Step-by-Step)
Make the Crust In a medium bowl, mix graham cracker crumbs with sugar and melted butter until it resembles damp sand. Press this mixture into a 9-inch pie dish, packing it down firmly across the bottom and slightly up the sides. A flat-bottomed glass or measuring cup helps make it even and tight. Pop the crust in the fridge while you prepare the filling—it’ll firm up as it chills.
Whip the Filling Beat the softened cream cheese until it’s smooth. Add powdered sugar, vanilla, and a bit of lemon juice, then continue mixing until the filling is creamy and lump-free. It should look light and feel fluffy—this is where the texture starts to come together.
Fold in the Whipped Topping Add the whipped topping and gently fold it into the cream cheese mixture using a spatula. Don’t stir too hard—you want to keep that soft, airy texture. It should feel like a cross between a mousse and a cheesecake.
Fill and Chill the Pie Spoon the filling into your chilled crust and use a spatula to smooth it evenly all the way to the edges. Cover the pie with plastic wrap and place it in the fridge for at least 4 hours, or overnight if you can wait. This helps it firm up just right.
Top with Strawberries Once chilled, slice fresh strawberries and arrange them on top of the pie in any design you like—spirals, layers, or a casual scatter. Just make sure each slice gets some fruit.
Glaze the Berries Gently warm a few tablespoons of strawberry jam with a splash of water until smooth. Let it cool a bit, then brush it over the strawberries for a shiny, beautiful finish. It makes the pie look bakery-worthy.
Slice and Serve To get clean, neat slices, dip your knife in warm water and wipe it off before each cut. Serve the pie cold—and don’t be surprised if everyone goes back for seconds.
Expert Tips for Success
Let your cream cheese soften at room temperature before mixing. It makes a big difference in getting a smooth filling.
Don’t skip chilling the crust—it helps everything hold together when slicing.
Gently fold in the whipped topping to keep the filling airy. Over-mixing will deflate it.
Make sure to chill the pie for several hours before serving. Rushing it will make the slices too soft.
Add the glaze just before serving so the strawberries stay fresh and bright.
Variations and Customizations
Citrus Brightness: Add a little lemon or orange zest to the filling for a pop of fresh flavor.
Chocolate Touch: Drizzle melted chocolate over the top before serving—or stir a little into the filling for something extra indulgent.
Berry Mix: Swap some strawberries for raspberries or blueberries for a colorful twist.
Nutty Base: Add finely chopped pecans or almonds to the crust for a bit of crunch.
Mini Versions: Use muffin tins with cupcake liners to make individual pies—great for parties or potlucks.
Storage and Reheating Instructions
Storing: Cover the pie tightly with plastic wrap or keep it in an airtight container in the refrigerator. It stays fresh for up to 3 days.
Freezing: Freeze the pie before adding the strawberry topping. Wrap it well, freeze for up to a month, then thaw in the fridge overnight and top with fresh strawberries and glaze before serving.
Reheating: This pie is best cold, so no need to reheat. If it’s a little too firm from the fridge, let it sit out for 10–15 minutes before serving.
Serving Suggestions
Serve it with a dollop of whipped cream or a few mint leaves for a fresh look.
Pair with iced tea or a light coffee for an easy, refreshing dessert.
Perfect for sunny days, potlucks, or backyard dinners.
Try it as part of a brunch spread—it fits in just as well next to fresh fruit or yogurt.
Summary and Encouragement
This Strawberry Cream Cheese Chill Pie is the kind of dessert that quietly becomes a favorite. It’s easy to make, feels special, and always gets compliments. You don’t need to be an experienced baker to pull it off, and it’s flexible enough to fit different occasions or personal tastes. Take your time with each step, enjoy the process, and don’t stress about perfection. It’s all about creating something sweet to share—simple as that.
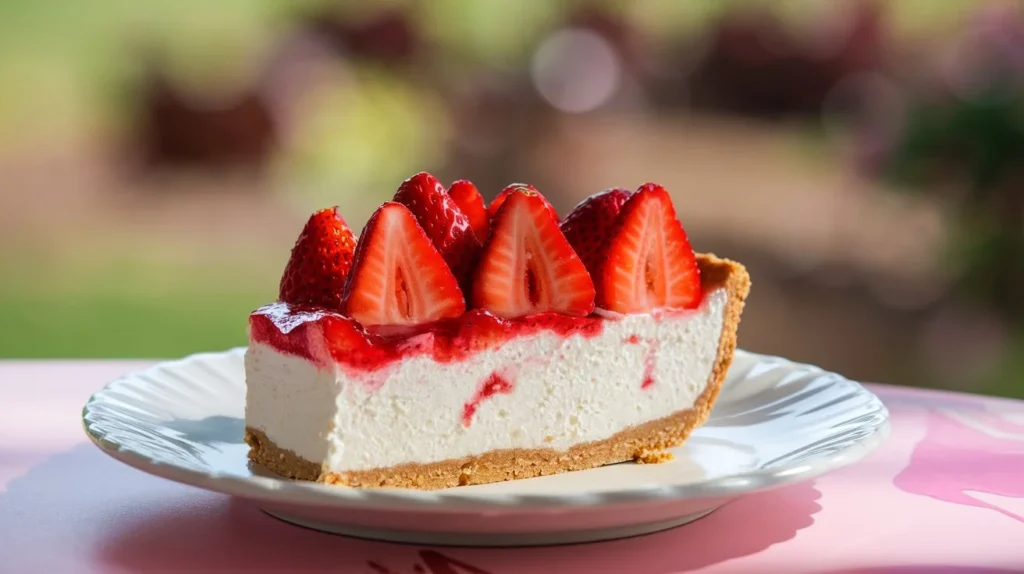
This Strawberry Cream Cheese Chill Pie is the ultimate no-bake dessert that’s light, creamy, and bursting with fresh strawberry flavor. A smooth whipped cream and cream cheese filling rests on a buttery graham cracker crust and is crowned with glossy, sweet strawberries. It's the perfect balance of richness and freshness, and comes together with minimal effort—ideal for summer gatherings, special occasions, or just an indulgent treat at home.
Ingredients
1 ½cups Graham cracker crumbs (About 10 full crackers, finely crushed)
6tbsp Unsalted butter (Melted)
2tbsp Granulated sugar (For the crust)
8oz Cream cheese (Softened)
1cup Powdered sugar (Sifted for a smoother filling)
1tsp Vanilla extract (Adds depth to the filling)
1cup Heavy whipping cream (Whipped to soft peaks)
2cups Fresh strawberries (Sliced, divided)
⅓cup Strawberry jam (Thinned with 1 tbsp water)
Instructions
1
Make the crust mixture
In a medium mixing bowl, stir together the graham cracker crumbs and sugar. Drizzle in the melted butter and mix it all with a fork until the crumbs are evenly moistened. You're going for that "wet beach sand" feel—damp enough to clump together when you press it in your hand.
2
Press and chill the crust
Pour the mixture into a 9-inch pie dish. Use your hands to gently press it into the bottom and a little up the sides, shaping it as evenly as you can. For a nice tight finish, grab the bottom of a flat measuring cup or glass and press it down—this step really helps the crust stay firm once chilled. Pop the crust in the fridge while you prep the filling.
3
Whip the cream cheese filling
Add your softened cream cheese to a large bowl. Beat it until it’s smooth, creamy, and completely lump-free—this part is key for that silky texture. Now add in the powdered sugar and vanilla, and beat again until everything blends into a soft, sweet cloud of goodness.
4
Fold in the whipped topping
Gently fold the whipped topping into your cream cheese mixture using a spatula. Keep it light and fluffy—don’t overmix. When the filling looks smooth, silky, and irresistibly creamy, you’re good to go.
5
Fill the crust
Spoon that fluffy filling into your chilled crust, then gently guide it toward the edges using a spatula or the back of a spoon. Take your time to smooth it all the way out so it looks even and inviting—like you're tucking it in with a cozy blanket.
6
Chill the pie
Cover the pie loosely with plastic wrap or foil and let it rest in the fridge for at least 4 hours (overnight is even better). This step helps the filling firm up so you get nice, clean slices when you serve.
7
Prep the strawberries
While the pie chills, give your strawberries a rinse, remove the green tops, and slice them thinly. Keep them chilled until you’re ready to top the pie.
8
Make a simple glaze (optional)
If you want that glossy bakery look, warm a few spoonfuls of strawberry jam with a splash of water in a small saucepan over low heat. Stir until smooth, let it cool a bit, and it’s ready to brush over the berries later.
9
Top the pie
Once the pie has chilled and set, arrange your strawberry slices on top. Fan them in circles for a polished look or go casual—either way, it’s going to look stunning. If you're using the glaze, lightly brush it over the berries for that extra shine.
10
Chill again (optional)
If you have time, return the topped pie to the fridge for another 15–30 minutes. It helps the fruit settle into the filling and lets the glaze set nicely.
11
Serve and enjoy
When you’re ready to serve, run a sharp knife under warm water and wipe it dry between slices. It may feel like an extra step, but it helps you glide through the creamy layers for those clean, photo-worthy pieces.
Nutrition Facts
Servings 8
Amount Per Serving
Calories365kcal
% Daily Value *
Total Fat22g34%
Saturated Fat13g65%
Cholesterol55mg19%
Sodium210mg9%
Potassium150mg5%
Total Carbohydrate36g12%
Dietary Fiber1g4%
Sugars24g
Protein4g8%
* Percent Daily Values are based on a 2,000 calorie diet. Your daily value may be higher or lower depending on your calorie needs.
Note
Crumb check: If the crust mixture feels dry or doesn’t clump, add another tablespoon of melted butter and mix again. It should hold its shape when pressed.
Firm crust tip: Pressing the crust in firmly makes all the difference. Use a flat-bottomed cup or glass to really compact it—this prevents crumbling later.
Room temp matters: Let the cream cheese fully soften before mixing. Cold cream cheese leads to lumpy filling, and you want it smooth and luscious.
Cool Whip alternatives: Prefer homemade? You can use freshly whipped cream—just beat 1 cup of cold heavy cream with 2 tablespoons of powdered sugar until stiff peaks form, then fold into the cream cheese mixture.
No jam? No problem: If you’re skipping the strawberry glaze, try brushing the berries with a little honey or maple syrup for shine and freshness.
Make-ahead winner: This is a great dessert to prep the night before. The flavors blend even better with time, and the filling holds its shape beautifully.
Slice like a pro: For clean, bakery-style slices, run your knife under warm water before cutting, and wipe it dry between each slice. It may seem like a small step, but it makes a big difference in keeping those creamy layers neat and picture-worthy.
Storage tips: Keep leftovers covered in the fridge. They’ll stay fresh for about 3 days—just know the strawberries may soften a bit.
Did you make this recipe?
Follow @velvetyrecipes on Instagram for more recipes.
Pin this recipe to share with your friends and followers.
Talia
Chef-Inspired Recipes for Home Cooks
My name is Talia, and I’m the heart and hands behind this blog. As a professional chef with years of experience in the kitchen, I created Velvety Recipes as a space to share my love for food, cooking, and the art of crafting delicious meals that are simple yet elegant.
Thank you for your support! We truly appreciate your time and effort. If you have any questions or need further assistance, feel free to reach out. Have a wonderful day!