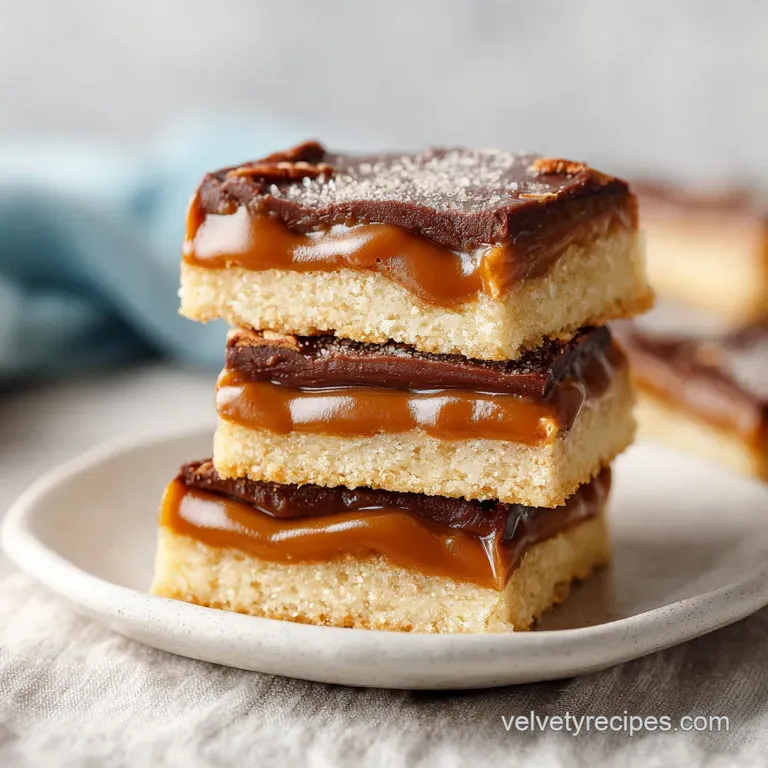
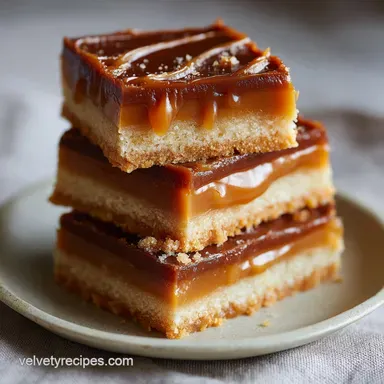
Simple Turtle Bars Recipe
- Time: Active 15 minutes, Passive 35 minutes, Total 50 minutes
- Flavor/Texture Hook: Velvety caramel meets a buttery crunch
- Perfect for: Holiday gifting, bake sales, or weekend indulgence
- Master the Chewy Texture of Turtle Bars
- Essential Recipe Specs and Metrics
- Choosing Your Rich Pantry Elements
- Necessary Tools for Perfect Results
- Crafting These Decadent Layered Bars
- Fixing Messy or Sticky Bars
- Creative Flavor Variations and Swaps
- Storage and Zero Waste Tips
- Serving Ideas and Texture Myths
- Recipe FAQs
- 📝 Recipe Card
Can we just talk about the smell of butter and brown sugar hitting a hot pan for a second? The first time I tried making these, I was convinced I’d messed up the caramel. I stood over the stove, watching the bubbles turn from a pale cream to a deep, nutty gold, feeling like a mad scientist.
That aroma toasted, sugary, and slightly salty is exactly what you want drifting through your kitchen.
Honestly, the "Turtle" name is a bit of a throwback, but the combination of pecans and chocolate is timeless for a reason. I used to buy these from a local bakery, but they were always too sweet or the shortbread was like cardboard.
Making them at home lets you control that "snap" of the chocolate and the "goo" of the center. You’ll know you’ve nailed it when you hear the shortbread shatter under your knife while the caramel stretches just enough to be tempting but not messy.
Master the Chewy Texture of Turtle Bars
The secret to why these bars hold their shape while remaining incredibly soft lies in the sugar structure. Most people assume the caramel is just melted candy, but the addition of sweetened condensed milk creates a stable emulsion that doesn't turn into a tooth shattering rock once it cools.
The Physics of the Stretch
Maillard Reaction: The proteins in the condensed milk react with the sugars under heat, creating complex flavor compounds and a flexible, chewy texture. This prevents the caramel from becoming brittle, ensuring it stays velvety even after refrigeration.
Starch Gelatinization: As the shortbread par bakes, the flour particles swell and trap the melting butter, creating a sturdy "floor" that won't get soggy when the heavy caramel is poured on top.
| Method | Total Time | Texture | Best For |
|---|---|---|---|
| Traditional Oven | 50 minutes | Shatter crisp base with deep caramelized notes | Gifting and parties |
| No Bake Shortcut | 20 minutes | Softer, graham style base with lighter flavor | Last minute cravings |
| Cake Mix Base | 40 minutes | Cakey, soft bottom that absorbs more caramel | Kids' snacks |
Choosing the right method depends on how much time you have. While the shortcut is great for a Tuesday night, the traditional oven method is what gives you those professional looking layers.
The extra 30 minutes in the oven transforms the raw flour and sugar into something that tastes like it came from a high end candy shop. Trust me, that shortbread crunch is the highlight of the whole experience.
Essential Recipe Specs and Metrics
To get that iconic "snap" in the chocolate topping, we need to be precise with our cooling times and temperatures. If you pour the chocolate while the caramel is still bubbling, they’ll mix together into a murky brown mess. We want distinct, gorgeous layers that look like a million bucks when you slice into them.
Component Deep Dive
| Ingredient | Science Role | Pro Secret |
|---|---|---|
| Cold Butter | Creates steam pockets for a flaky, short texture | Grate the butter while frozen for the ultimate crumb |
| Condensed Milk | Acts as an emulsifier for the fudgy caramel layer | Whisk constantly to prevent the milk solids from scorching |
| Coconut Oil | Lowers the melting point of chocolate for a soft snap | Just a teaspoon keeps the chocolate from cracking when sliced |
Chef Note: Always use "semi sweet" chips rather than "milk chocolate." The higher cacao content balances the intense sweetness of the condensed milk caramel, preventing the bars from being cloying.
Choosing Your Rich Pantry Elements
Don't settle for generic ingredients here; because there are so few components, quality really shows. Look for pecans that are plump and haven't been sitting in a dusty bin for six months. If your nuts smell like old cardboard, your bars will too.
- All purpose flour (250g): The structural backbone of the base.
- Granulated sugar (100g): Provides sweetness and helps the base crisp up.
- Unsalted butter, cold (170g): Essential for that "short" cookie texture. Why this? Using cold butter prevents the flour from absorbing too much fat early on.
- Light brown sugar (110g): Adds molasses notes to the caramel layer.
- Sweetened condensed milk (14 oz / 400g): The shortcut to a perfect, no fail caramel.
- Unsalted butter (113g): For the caramel adds richness and shine.
- Pecan halves (225g): Use large pieces so you actually get a crunch in every bite. Why this? Halves provide better visual appeal and a more satisfying texture than crumbs.
- Semi sweet chocolate chips (255g): Provides a dark, velvety contrast to the sugar.
- Coconut oil (1 tsp): Keeps the chocolate topping glossy and sliceable.
- Flaky sea salt (1/4 tsp): The ultimate flavor finisher.
For a fun twist, you can swap the pecans for walnuts if that's what you have on hand. If you're looking for more bar style inspiration, you might enjoy my Congo Bars Recipe which uses a similar caramelized sugar profile but with a more cake like crumb.
Necessary Tools for Perfect Results
You don't need a professional pastry kitchen for this, but two specific tools will make your life a thousand times easier. First, a heavy bottomed saucepan is non negotiable for the caramel. Thin pans have "hot spots" that will burn the milk solids before the sugar even melts.
Second, get yourself some parchment paper. Don't just grease the pan; the sugar in the caramel will act like superglue once it cools. By lining the pan with an "overhang" (like little handles), you can lift the entire block of bars out once they're set.
This makes slicing perfectly straight lines a breeze instead of a sticky nightmare.
Crafting These Decadent Layered Bars

- Preheat the oven to 180°C (350°F). Note: This ensures the shortbread starts searing as soon as it hits the rack.
- Pulse the flour, granulated sugar, salt, and 170g cold butter in a food processor until it looks like coarse sand.
- Press the mixture firmly into a lined 9x13 inch pan. Bake 15 minutes until the edges are just barely turning golden.
- Melt 113g butter and brown sugar in a saucepan over medium heat until it starts to sizzle and bubble.
- Whisk in the condensed milk and vanilla. Cook 3-5 minutes until the mixture thickens and turns a light amber color.
- Spread the pecan halves evenly over the par baked shortbread base.
- Pour the hot caramel over the pecans. Bake 15-20 minutes until the caramel is bubbling vigorously across the entire surface.
- Melt the chocolate chips and coconut oil together in the microwave in 30 second bursts until velvety and smooth.
- Drizzle the chocolate over the cooled caramel layer and spread with a spatula.
- Sprinkle with flaky salt and chill 2 hours until the chocolate provides a firm snap when pressed.
Fixing Messy or Sticky Bars
We've all been there you go to cut a bar and the caramel flows out like lava, or the shortbread turns into a pile of dust. Most of these issues come down to temperature control. If your caramel didn't set, it likely didn't reach a high enough temperature on the stove or in the second bake.
Why Your Shortbread is Crumbly
If the base is falling apart, the butter wasn't incorporated well enough or the "sand" mixture wasn't pressed into the pan hard enough. You really need to use the bottom of a measuring cup to pack it down. Think of it like building a foundation for a house; it needs to be solid.
| Problem | Root Cause | Solution |
|---|---|---|
| Runny Caramel | Under cooked milk sugars | Bake the bars 5 minutes longer next time or boil the caramel harder |
| Separated Chocolate | Overheating during melting | Melt in shorter bursts and stir frequently to distribute residual heat |
| Soggy Bottom | Pouring caramel on raw dough | Ensure the shortbread is par baked until it feels dry to the touch |
Common Mistakes Checklist
- ✓ Using room temperature butter for the base (leads to a greasy, flat cookie).
- ✓ Forgetting to line the pan with parchment (the caramel will stick permanently).
- ✓ Slicing the bars while they are still warm (the layers will smudge together).
- ✓ Using "low-fat" condensed milk (it won't emulsify correctly with the butter).
- ✓ Not toasting the pecans first (raw nuts lack the "shatter" texture we want).
Creative Flavor Variations and Swaps
If you want to move away from the traditional turtle profile, there are plenty of ways to mix this up. I’ve seen people use pretzels instead of pecans for a salty sweet vibe that is absolutely addictive. The crunch of the pretzel against the velvety caramel is a match made in heaven.
For those who prefer a fruitier finish, try adding a layer of dried cranberries between the pecans and the caramel. The tartness cuts through the sugar beautifully. If you're a fan of these types of layered treats, you should definitely check out my Carrot Cake Cream recipe for another take on the perfect dessert bar.
- Dark Chocolate Version: Use 70% cacao chips for a less sweet, more sophisticated bar.
- Salted Peanut Swap: Use roasted salted peanuts instead of pecans for a "Snickers" style flavor.
- The Spice Kick: Add 1/2 tsp of cinnamon to the shortbread base to warm up the flavor profile.
Storage and Zero Waste Tips
These bars are surprisingly hardy. Because of the high sugar and fat content, they don't go stale nearly as fast as a standard sponge cake. You can keep them in an airtight container at room temperature for up to 5 days, or in the fridge for 2 weeks.
If you live in a warm climate, the fridge is your best friend to keep that chocolate snappy.
For freezing, wrap individual bars in parchment paper and then place them in a freezer bag. They'll stay perfect for 3 months. To eat, just let them sit on the counter for 20 minutes or eat them straight from the freezer if you like a really chewy challenge!
Don't throw away those tiny broken crumbs at the bottom of the pan! Save them in a jar and use them as a "Turtle Sundae" topping for vanilla ice cream. The mixture of buttery shortbread bits, hardened caramel, and chocolate is too good to waste.
Serving Ideas and Texture Myths
A common myth is that you need a candy thermometer to make "real" caramel. While that's true for hard candies, this condensed milk version is much more forgiving. You’re looking for visual cues thick bubbles and a color change rather than a specific degree.
Don't let the fear of "real" candy making stop you from trying these.
When it comes to serving, these bars are incredibly rich, so I suggest cutting them into smaller squares than you think you need. A 2 inch square is usually plenty for one person. They pair beautifully with a strong, black coffee or a cold glass of oat milk to balance out the decadence.
- Temperature Check: Always slice these cold, but serve them at room temperature for the best "stretch."
- Clean Cuts: Dip your knife in hot water and wipe it dry between every single cut for those bakery perfect edges.
- The "Salt" Factor: Don't skip the flaky salt on top; it's the bridge that connects the chocolate and the caramel.
Right then, you're ready to tackle the best batch of Turtle Bars you've ever had. Just remember to watch that caramel like a hawk, pack that shortbread base down like you mean it, and most importantly, try to wait at least an hour before you dive in.
Your patience will be rewarded with the most velvety, crunchy, and indulgent bite imaginable. Let's crack on!

Recipe FAQs
What temperature should the oven be for the initial shortbread bake?
Preheat the oven to 180°C (350°F). This temperature ensures the shortbread starts searing immediately, establishing a sturdy base before the heavy caramel is added.
How long should I cook the condensed milk and butter mixture for the caramel layer?
Cook the mixture for 3 to 5 minutes after whisking in the condensed milk. Watch for it to thicken slightly and achieve a light amber color; visual cues are key for this forgiving caramel.
Why do my bars crumble when I try to slice them?
The shortbread foundation was likely not packed firmly enough. Use the bottom of a measuring cup to press the base mixture tightly into the pan to create the necessary structural integrity.
How do I ensure the chocolate topping has a perfect "snap" instead of being soft?
Incorporate one teaspoon of coconut oil into the melted chocolate chips. This addition lowers the chocolate’s melting point just enough to allow for a glossy, brittle finish once chilled.
Is it true that I must use a double boiler for melting the chocolate topping?
No, this is a common misconception. A microwave used in short 30-second bursts, stirring frequently, works perfectly and is much faster for achieving smooth melted chocolate.
How long must the finished bars chill before they are ready to slice cleanly?
Chill the bars for at least 2 hours until the chocolate layer is firm. Slicing them while cold ensures the caramel stays thick and the layers separate without smudging.
What is the best way to keep leftover Turtle Bars fresh for longer than three days?
Store individual bars wrapped in parchment paper inside an airtight container in the refrigerator. They maintain optimal texture and flavor for up to two weeks when kept cold.
Buttery Turtle Bars Recipe
Ingredients:
Instructions:
Nutrition Facts:
| Calories | 327 kcal |
|---|---|
| Protein | 3.8 g |
| Fat | 21.2 g |
| Carbs | 33.6 g |
| Fiber | 1.9 g |
| Sugar | 22.9 g |
| Sodium | 65 mg |
