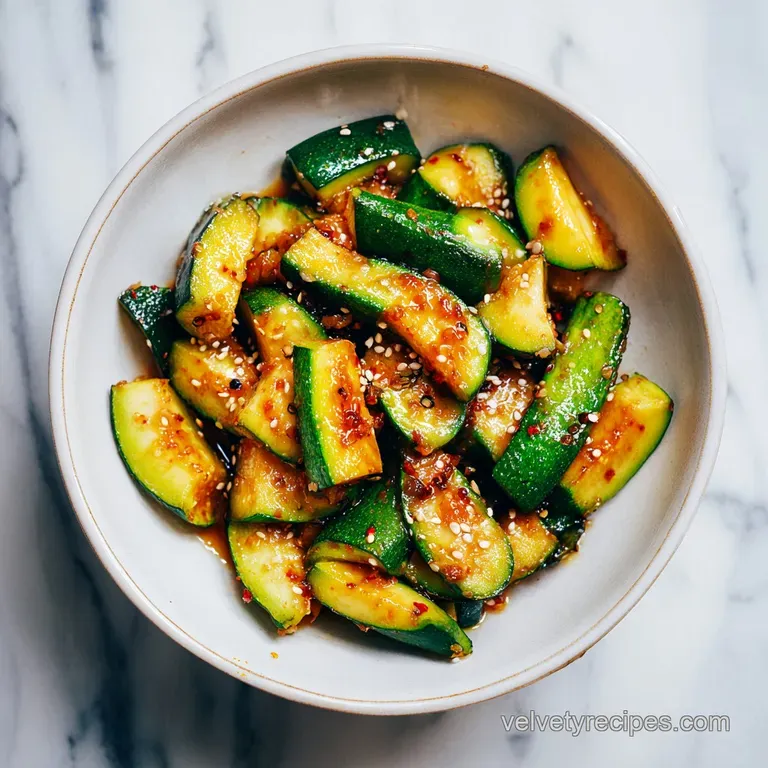
Sauteed Zucchini: Tender and Golden
- Time: Active 5 minutes, Passive 7 minutes, Total 12 minutes
- Flavor/Texture Hook: Sizzling golden edges with a crisp tender center
- Perfect for: Quick weeknight dinners or healthy meal prep
- The Best Sautéed Zucchini Recipe Ever
- How the Heat Stops Sogginess
- Component Analysis of Our Elements
- The Building Blocks of Flavor
- Necessary Skillet and Knife Setup
- Cooking Steps for Golden Results
- Fixing Common Texture Mistakes
- Fresh Variations and Flavor Swaps
- Proper Storage and Leftover Tips
- Perfect Pairings for Your Table
- Debunking Common Kitchen Myths
- Recipe FAQs
- 📝 Recipe Card
The Best Sautéed Zucchini Recipe Ever
We've all been there, standing over a stove, watching a beautiful pile of fresh green squash turn into a grey, watery puddle. It's heartbreaking. You wanted that crisp, golden edge that looks like it came from a professional kitchen, but instead, you got something that looks more like it was steamed in a microwave.
I spent years making this exact mistake, piling too many slices into a small pan and wondering why they wouldn't brown. The secret isn't a fancy tool or a secret spice; it's actually about doing less and letting the heat do the work.
When you drop those 1/2 inch half moons into the shimmering olive oil, the first thing you should hear is a sharp, aggressive sizzle. That sound is the moisture on the surface evaporating instantly. If the pan is quiet, you're already in trouble. This recipe is designed to fix that "mush factor" once and for all.
We're going for a texture that has a slight "shatter" on the outer skin while the inside stays velvety and rich. It’s the kind of side dish that actually feels hearty enough to stand next to a big steak or a roast chicken without disappearing into the background.
The first time I got this right, I realized I had been "babysitting" the pan way too much. I was stirring every thirty seconds, which is the fastest way to kill a good sear. Once I learned to just walk away for three minutes, everything changed.
You'll see the edges start to curl and darken, and the aroma of toasted garlic and sweet onion will fill the kitchen. Trust me on this, once you nail the single layer technique, you’ll never go back to the old, soggy way again. Right then, let's get into the "how" and the "why" of this stovetop magic.
How the Heat Stops Sogginess
The biggest hurdle with zucchini is its water content it's basically a green sponge. To get a brown crust instead of a steam bath, we have to manipulate how that water escapes the vegetable.
- Surface Evaporation: High heat turns surface moisture into steam immediately, allowing the sugars in the squash to brown before the interior gets mushy.
- Thermal Mass: Using a heavy bottomed skillet ensures the temperature doesn't drop when the cold vegetables hit the oil, maintaining the sear.
- Starch Sealing: The rapid heat creates a thin, dried out layer on the surface that acts as a barrier, keeping the internal juices from leaking out too early.
- Single Layer Mandate: Crowding the pan traps steam between the slices; giving them space allows that steam to escape into the air where it belongs.
| Thickness | Done Marker | Rest Time | Visual Cue |
|---|---|---|---|
| 1/2 inch | 7 minutes | 1 minute | Deep mahogany edges |
| 1/4 inch | 4 minutes | 0 minutes | Translucent center |
| 1 inch | 10 minutes | 2 minutes | Fork tender middle |
This quick decision table helps you adjust based on how you prefer your vegetables sliced. If you’re in a rush, a thinner slice works, but you lose that velvety interior. For the best balance of crunch and creaminess, stick to the 1/2 inch half moons.
Component Analysis of Our Elements
Understanding what each ingredient brings to the party helps you become a more intuitive cook. It isn't just about putting things in a pan; it's about how they interact under heat.
| Ingredient | Science Role | Pro Secret |
|---|---|---|
| Extra Virgin Olive Oil | Heat Conductor | Wait for the shimmer; cold oil leads to sticking and greasiness. |
| Zucchini | Structural Base | Use medium ones; large ones have too many seeds and excess water. |
| Sliced Garlic | Aromatic Finish | Add it at the end to prevent the bitter flavor of burnt sulfur. |
| Sea Salt | Moisture Regulator | Season after cooking to prevent the salt from drawing out water in the pan. |
Adding the salt at the very end is a non negotiable rule for this sauteed zucchini recipe. If you salt the raw squash, the osmotic pressure will pull water to the surface, and you'll end up steaming the vegetables instead of sautéing them.
The Building Blocks of Flavor
To get this dish right for four people, you need to be precise with your prep. These ingredients are simple, but their quality matters because there is nowhere to hide in such a clean dish.
- 3 medium zucchini (approx. 680g): Slice these into 1/2 inch half moons. Why this? Provides the perfect surface to volume ratio for a great sear.
- 1 small yellow onion (110g): Thinly sliced. Why this? They caramelize at the same rate the zucchini browns.
- 2 tbsp extra virgin olive oil: Use a high-quality oil. Why this? The fat carries the garlic and pepper flavor deep into the squash.
- 3 cloves garlic (15g): Thinly sliced, not minced. Why this? Slices are less likely to burn and offer a milder, sweet bite.
- 1/2 tsp red pepper flakes: For a gentle hum of heat.
- 1/2 tsp fine sea salt: To brighten the natural sweetness.
- 1/4 tsp freshly cracked black pepper: For foundational spice.
- 1 tbsp fresh flat leaf parsley: Chopped fine for a hit of green freshness.
- 2 tbsp freshly grated parmesan cheese: For a salty, savory finish.
| Original Ingredient | Substitute | Why It Works |
|---|---|---|
| Yellow Onion | Shallots | Sweeter and more delicate; use two large shallots instead. |
| Parmesan Cheese | Pecorino Romano | More tang and saltiness. Note: Reduce sea salt slightly if using. |
| Extra Virgin Olive Oil | Ghee (Clarified Butter) | Higher smoke point and adds a rich, nutty flavor. |
| Red Pepper Flakes | Aleppo Pepper | Provides a fruitier, milder heat with less "sting." |
Honestly, don't even bother with pre grated parmesan in a green shaker bottle. It has cellulose to keep it from clumping, which means it won't melt into that beautiful, lacy crust we’re looking for. Buy a wedge and grate it yourself; the difference is worth every penny.
Necessary Skillet and Knife Setup
You don't need a kitchen full of gadgets for this, which is the beauty of it. We are focusing on minimal tools that provide maximum reliability.
- 12 inch heavy bottomed skillet: Cast iron or stainless steel is best here. They hold heat much better than thin aluminum pans, which prevents the temperature from plummeting when you add the veg.
- Sharp Chef's Knife: You want clean cuts through the zucchini skin. A dull knife will bruise the vegetable and release more moisture before it even hits the pan.
- Flat Wooden Spatula: Great for scraping up any caramelized bits (the "fond") from the bottom of the pan without scratching your cookware.
- Cutting Board: A large one gives you space to organize your half moons so they don't pile up.
If you don't have a large enough pan to keep everything in a single layer, please, do yourself a favor and work in batches. If the zucchini are overlapping, they will catch the steam from the layer below them, and you'll lose that "shatter" texture we're aiming for.
Cooking Steps for Golden Results
- Heat the pan: Place your 12 inch heavy bottomed skillet over medium high heat. Add the 2 tbsp olive oil and wait until it begins to shimmer and is intensely hot. Note: This ensures the zucchini sears on contact.
- Arrange the vegetables: Add the sliced zucchini and onions to the pan in a single layer. Cook 3 minutes undisturbed until a deep mahogany colored crust forms on the bottom.
- The Flip: Use your spatula to flip the zucchini slices. You should see a beautiful golden brown color on the cooked side.
- Make space: Move the vegetables to the edges of the pan, creating a clear spot in the center.
- Toast the aromatics: Drop the 3 cloves of sliced garlic and 1/2 tsp red pepper flakes into that center spot. Cook 60 seconds until the garlic is fragrant and golden.
- Combine: Toss all ingredients together, ensuring the garlic and oil coat every piece of squash.
- Final Seasoning: Remove the pan from the heat immediately.
- Garnish: Season with the 1/2 tsp sea salt, 1/4 tsp black pepper, 1 tbsp parsley, and 2 tbsp parmesan cheese.
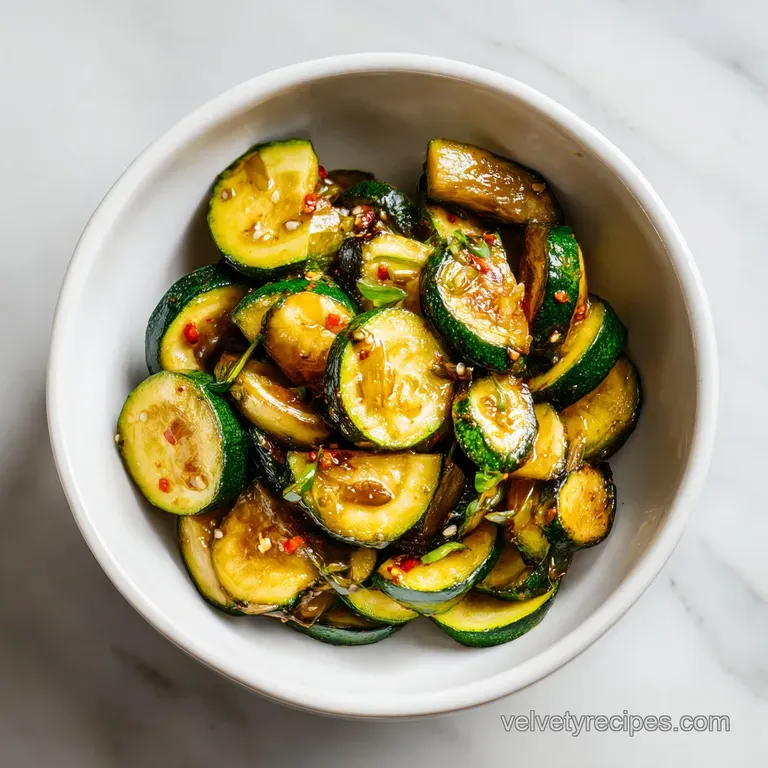
- Serve: Transfer to a warm plate and enjoy immediately while the crust is at its peak.
If you find yourself craving something a bit heartier, this technique works beautifully with other vegetables too. For instance, my silky sauteed eggplant follows a similar principle of high heat and patience to avoid that spongy, oily texture eggplant can sometimes have.
Fixing Common Texture Mistakes
Zucchini is forgiving, but there are a few ways it can go sideways. Most issues stem from heat management or timing.
Why Your Zucchini is Watery and Grey
This is the most common complaint. It usually happens because the pan wasn't hot enough or you crowded the pan. When too many vegetables are in the pan, the temperature drops, and the water inside the zucchini starts to boil rather than evaporate. This results in a "steamed" look rather than a sautéed one.
The Garlic is Bitter or Burnt
Garlic is delicate. If you add it at the beginning with the zucchini, it will spend 10 minutes in a over high heat environment and turn black. Burnt garlic is incredibly bitter and will ruin the whole dish.
By waiting until the final minute, you're just "toasting" it enough to release its oils without destroying the flavor.
| Problem | Root Cause | Solution |
|---|---|---|
| Soft/Mushy | Low heat or crowding | Use medium high heat and work in batches if needed. |
| Bitter Aftertaste | Burnt garlic | Add garlic only in the last 60 seconds of cooking. |
| Uneven Browning | Slices too thick/thin | Ensure all half moons are a consistent 1/2 inch. |
Common Mistakes Checklist
- ✓ Pat the sliced zucchini dry with a paper towel before adding to the pan.
- ✓ Do not stir for the first 3 minutes; let the crust develop.
- ✓ Use a heavy pan (cast iron is king) to maintain consistent heat.
- ✓ Add salt only after the pan is off the heat to keep the squash firm.
- ✓ Slice the garlic instead of mincing it to prevent burning.
Fresh Variations and Flavor Swaps
Once you’ve mastered the basic sauteed zucchini recipe, you can start playing with the flavor profile to match whatever else you're serving.
The Mediterranean Twist
Swap the parsley for fresh oregano and add a tablespoon of briny capers at the very end. Instead of parmesan, crumble some high-quality feta over the top. The saltiness of the feta against the charred zucchini is incredible.
The Lemon Herb Refresh
If you're serving this with fish, add the zest of one lemon and a teaspoon of fresh thyme when you add the garlic. The citrus oils will cut through the richness of the olive oil and make the whole dish feel lighter and brighter.
Vegan and dairy-free Power Up
Omit the parmesan and replace it with 1 tbsp of nutritional yeast or toasted pine nuts. The nuts add a lovely "crunch" that mimics the texture of the cheese crust while keeping it completely plant based.
| Method | Time | Texture | Best For |
|---|---|---|---|
| High Heat Sauté | 12 mins | Crispy/Charred | Quick dinner side |
| Low & Slow | 25 mins | Jammy/Soft | Pasta toppings |
| Air Fryer | 10 mins | Very Crunchy | Healthy snacking |
If you have leftovers and want to turn this into a full meal, it makes an excellent base for a quick bowl. Mix the cold zucchini with some leftover grains or even use it as a filling for lasagna boats if you have some tomato sauce on hand.
Proper Storage and Leftover Tips
Zucchini is definitely at its best about 30 seconds after it leaves the pan, but life happens, and sometimes you have leftovers.
Storage: Keep leftovers in an airtight container in the fridge for up to 3 days. Do not freeze this dish. Zucchini has such a high water content that the cell walls will completely collapse when frozen and thawed, leaving you with a literal pile of mush.
Reheating: Avoid the microwave if you can. It will make the zucchini rubbery. Instead, toss them back into a hot, dry skillet for 2 minutes. This will help evaporate any moisture that seeped out during storage and bring back a bit of that original texture.
Zero Waste Tip: If your leftovers are a bit too soft for your liking, don't throw them away! Chop them up and stir them into a morning frittata or an omelet. The caramelized onions and garlic already provide a massive flavor headstart for your breakfast.
You can also blend them into a vegetable soup as a natural thickener.
Perfect Pairings for Your Table
This dish is a chameleon. Because of its savory, garlicky profile, it fits into almost any menu.
For a classic family meal, I love serving this alongside a protein that has some weight to it. It’s light enough to balance out something like mashed potatoes with gravy, providing a fresh, green contrast to the rich meat and potatoes. The red pepper flakes in the zucchini provide a little "zing" that cuts through the fat of the gravy.
If you’re going for an Asian inspired night, omit the parmesan and parsley. Instead, finish the dish with a splash of soy sauce and a drizzle of toasted sesame oil. It pairs beautifully with hibachi chicken for a restaurant style experience at home. The key is to keep the side dish simple so it doesn't compete with the main course's seasonings.
Debunking Common Kitchen Myths
Myth: You should peel zucchini for a better texture. Truth: Never peel your zucchini for a sauté! The skin is where the structural integrity lives. Without the skin, the squash will fall apart and turn into a purée in the pan.
Plus, the skin holds most of the nutrients and provides that beautiful green color contrast against the mahogany sear.
Myth: Soaking zucchini in salt water makes it crispier. Truth: While this works for eggplant to remove bitterness, it's a disaster for zucchini. It just hydrates the "sponge" and makes it impossible to get a good sear. Keep it dry, slice it fresh, and season at the very end.
Myth: You need a non stick pan for vegetables. Truth: Non stick pans are actually quite bad for getting a deep sear because they don't allow the food to "grab" the surface. Stainless steel or cast iron will give you a much better crust.
If your zucchini is sticking, it’s usually because the pan wasn't hot enough or you tried to flip it too early. When the crust is properly formed, the vegetable will naturally "release" from the pan.

Recipe FAQs
How do you keep zucchini from getting soggy when sauteed?
Maintain a single layer in a preheated 12 inch heavy bottomed skillet. Overcrowding the pan causes the vegetables to steam in their own released moisture rather than sear; if you enjoyed mastering this high heat searing technique, see how the same principles of heat control improve our Mediterranean chicken patties.
What seasoning is good on sauteed zucchini?
Use a combination of fine sea salt, freshly cracked black pepper, red pepper flakes, and freshly grated parmesan cheese. These simple additions provide the necessary saltiness and heat to cut through the natural sweetness of the squash.
How long do you sauté zucchini for?
Sauté for a total of 7 minutes. This includes 3 minutes of undisturbed searing to build the crust, 60 seconds to cook the garlic and red pepper flakes, and final tossing to integrate the parsley and parmesan.
What are common mistakes when sautéing zucchini?
Adding the vegetables before the olive oil begins to shimmer or stirring too frequently. Failing to wait for the pan to get intensely hot prevents the mahogany crust from forming, and constant movement prevents the vegetable from developing that essential golden color.
Is it true that I should peel the zucchini before cooking?
No, this is a common misconception. The skin provides essential structural integrity that prevents the zucchini from disintegrating into mush during the high heat cooking process.
Can I slice the zucchini in advance to save time?
Yes, you can slice the zucchini and onion up to 24 hours in advance. Store them in an airtight container in the refrigerator and ensure they are patted dry before hitting the hot oil to guarantee a proper sear.
Why is my garlic burning before the zucchini is finished?
Garlic cooks much faster than squash, so it must be added only in the final 60 seconds. Pushing the zucchini to the edges of the pan creates a cooler space in the center, allowing the garlic to toast to golden perfection without scorching.
Pan Seared Sauteed Zucchini

Ingredients:
Instructions:
Nutrition Facts:
| Calories | 115 kcal |
|---|---|
| Protein | 3.3 g |
| Fat | 8.0 g |
| Carbs | 9.2 g |
| Fiber | 2.2 g |
| Sugar | 5.4 g |
| Sodium | 313 mg |
