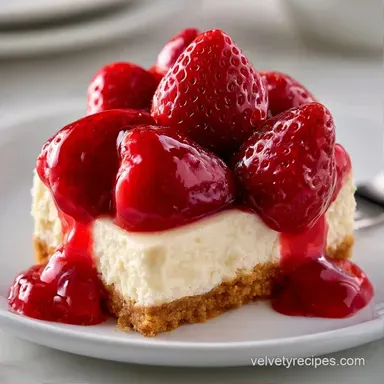
No Bake Strawberry Dream Dessert
- Time: 30 min active + 4 hours chilling
- Flavor/Texture Hook: Tangy cream cheese meets fresh, syrupy strawberries on a crunchy base
- Perfect for: Summer potlucks, family gatherings, or beginner bakers
Have you ever wondered why some no bake desserts feel like a heavy cloud while others feel like a fresh breeze? I spent a long time making treats that were either too runny to slice or so stiff they tasted like a block of frozen cream.
Then I tried this specific layering method. The contrast between the saltiness of the graham cracker and the brightness of the berries is what makes it hit the spot. It is the kind of thing you put on a table and see vanish in ten minutes.
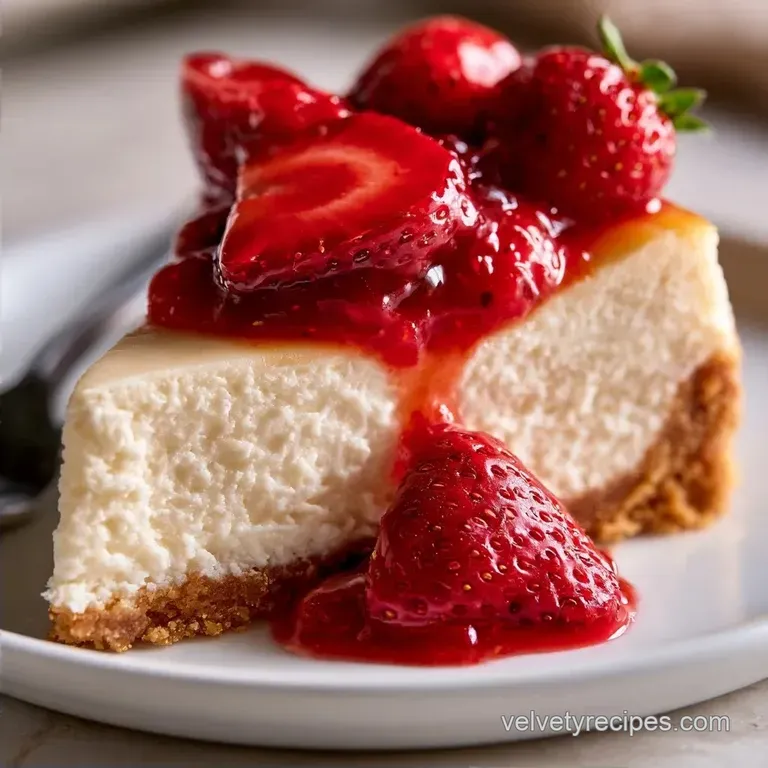
This Strawberry Dream Dessert isn't about fancy techniques. It is about getting the temperatures right and letting the fridge do the heavy lifting. You get a rich, creamy middle and a topping that tastes like summer.
Strawberry Dream Dessert
Right then, let's look at why this actually holds together without an oven. Most no bake cakes fail because the fat in the cream cheese separates or the crust gets soggy.
Cold Set: Freezing the crust for 10 minutes creates a hard butter barrier that stops the filling from soaking in. Folded Air: Using a 'cut and fold' motion with the whipped cream keeps the air bubbles intact, which prevents the mousse from collapsing.
The choice between using fresh berries or a shortcut jam can change the whole vibe of the dish. Fresh berries give you a clean, tart pop, while jam makes it denser and sweeter.
| Feature | Fresh Berries | Jam Shortcut |
|---|---|---|
| Texture | Chunks of fruit | Smooth and gooey |
| Flavor | Tart and bright | Concentrated sweetness |
| Prep Time | 10 min maceration | Zero prep |
Getting the Texture Right
To get a clean slice, you need the filling to be stable. If the cream cheese is too cold, you'll get lumps. If it's too warm, it won't hold the air. I always leave my block of cream cheese on the counter for two hours before starting.
The stabilized whipped cream is the real hero here. It doesn't weep or separate over time. For more on how to handle crumb textures for bases, King Arthur Baking has some great tips on graham crumbs.
The Key Ingredients
Every part of this dessert has a job. The lemon juice isn't just for flavor; it cuts through the heavy fat of the cream cheese and helps the berries release their juices.
| Ingredient | What It Does | Best Swap |
|---|---|---|
| Graham Crumbs | Provides structural crunch | Digestive biscuits |
| Cream Cheese | Adds tang and body | Mascarpone (richer) |
| Stabilized Cream | Keeps the filling fluffy | Heavy cream + gelatin |
Timing and Yield
I've found that rushing the chill time is the biggest mistake people make. If you cut into this after two hours, the middle will be soft. Give it the full four hours.
- Prep time:30 minutes
- Cook time:0 minutes
- Total time:4 hours 30 mins
- Yield: 12 servings
Essential Kitchen Tools
You don't need a professional setup, but a few things make it easier. A 9x13 inch baking dish is the standard here. If you use a deeper dish, you'll just have thicker layers, but you might need more chilling time.
A rubber spatula is mandatory for the folding step. A whisk is too aggressive and will knock the air out of your cream. I also suggest using a measuring cup to press the crust; it's flatter and firmer than using your hands.
Step by step Assembly
Let's get into it. This is where the layers build up.
- Mix the graham cracker crumbs, melted butter, and sugar in a bowl.
- Press the mixture firmly into the bottom of a 9x13 inch baking dish using the bottom of a measuring cup. Note: Pack it tight so it doesn't crumble when slicing.
- Place the dish in the freezer for 10 minutes.
- Beat the softened cream cheese and powdered sugar until the mixture is completely smooth.
- Stir in the vanilla extract.
- Gently fold in the stabilized whipped cream using a rubber spatula until no white streaks remain. Note: Use a 'cut and fold' motion to keep the fluffiness.
- Spread the cream cheese filling evenly over the chilled crust.
- Toss the sliced strawberries with sugar and lemon juice. Let them sit for 10 minutes until a natural syrup forms.
- Spoon the berries over the cream cheese layer and spread them to the edges.
- Smooth the top and refrigerate for 4 hours until the filling feels firm to the touch.
Troubleshooting Common Issues
Even a simple Strawberry Dream Dessert can go sideways if the ingredients aren't behaving. Usually, it comes down to temperature or mixing speed.
Mousse Stability
If the filling feels too soft, it's usually because the whipped cream wasn't stabilized or the cream cheese was too warm during the beat. You can't "re set" it once it's spread, but you can chill it for an extra two hours.
Crispy Crust
A soggy crust happens when the butter doesn't set. That 10 minute freezer blast is not optional. It locks the fat in place.
Managing Berry Juice
Too much syrup can bleed into the cream layer. I've learned to drain a bit of the excess liquid from the strawberries before spooning them on top.
| Problem | Root Cause | Solution |
|---|---|---|
| Lumpy filling | Cold cream cheese | Let cheese reach room temp |
| Runny mousse | Over mixing | Fold gently with a spatula |
| Soggy base | Skipped freezer step | Chill crust 10 mins before filling |
Scaling the Recipe
If you're making this for a small group, you can easily halve it. Use an 8x8 inch square pan instead. The prep time stays the same, but I'd suggest reducing the chilling time to 3 hours since the mass is smaller.
For a massive party, doubling the recipe works, but don't put it all in one giant deep pan. Use two 9x13 dishes. If you pile the layers too high, the bottom can compress and lose that airy feel. Just remember to only increase the salt or vanilla to 1.5x too much can overpower the strawberries.
Truths and Myths
There's a common idea that you need to use a mixer for the berries to get them "syrupy." That's not true. The sugar and lemon juice do all the work through osmosis. Just tossing them in a bowl is enough.
Some people think you have to bake the graham crust to make it stay. You don't. The melted butter acts as the glue. Once it hits the freezer, it's just as stable as a baked crust but tastes fresher.
Storage and Waste Tips
Store this in the fridge covered with plastic wrap. It stays good for about 3 to 4 days. Don't freeze it; the cream cheese and whipped cream will change texture and become grainy when thawed.
If you have leftover strawberry stems or tops, don't toss them. Throw them in a freezer bag with some sugar and a splash of water to make a quick syrup for pancakes. According to USDA FoodData, strawberries are packed with vitamin C, so every bit is useful.
Ways to Serve
This dish is pretty on its own, but a sprig of fresh mint on each slice makes it look like it came from a cafe. I like to serve it with a small dollop of extra whipped cream on the side.
For a different take on the flavor profile, you might like strawberry shortcake ice cream. It uses similar notes but in a frozen format. Either way, the key is keeping everything cold until the moment it hits the table.
Swaps and Twists
You can easily turn this into a Strawberry Banana Dream Dessert by adding sliced bananas to the berry layer. Just toss the bananas in lemon juice too, or they'll turn brown.
If you want something even colder, my Strawberry Ice Cream Recipe is a great shout. For those wanting a lighter version, you can swap the graham crackers for crushed almonds or walnuts for a nuttier, lower carb base.
| Original Ingredient | Substitute | Why It Works |
|---|---|---|
| Graham Crumbs | Crushed Almonds | Nutty flavor. Note: Higher protein, less sweetness |
| Powdered Sugar | Maple Syrup | Natural sweetness. Note: Makes filling slightly softer |
| Lemon Juice | Lime Juice | Zesty twist. Note: Works best with tropical fruit additions |
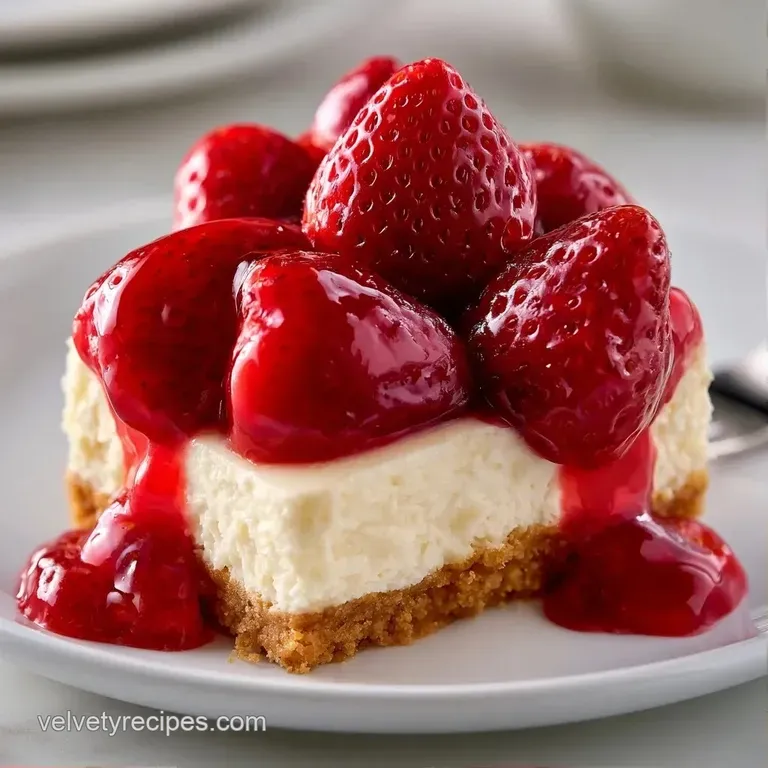
This Strawberry Dream Dessert is all about those layers. You get the crunch, the silky cream, and the tart fruit in every single bite. It's an easy win for any occasion.
Recipe FAQs
What is Strawberry Dream Dessert?
A layered, no-bake treat. It features a buttery graham cracker crust topped with a creamy cream cheese filling and a fresh macerated strawberry layer.
What are the main ingredients in a Strawberry Dream?
Graham cracker crumbs, butter, sugar, cream cheese, powdered sugar, vanilla, stabilized whipped cream, and fresh strawberries with lemon juice. These components create a balance between the crunchy base, fluffy center, and tart fruit topping.
How to make a strawberry dream?
Press a mixture of graham cracker crumbs, melted butter, and sugar into a 9x13 inch pan. Chill the crust, fold stabilized whipped cream into a smooth cream cheese and sugar mixture, and top with strawberries macerated in sugar and lemon juice.
Is it true that I can freeze this dessert to save it for later?
No, this is a common misconception. Freezing the cream cheese and whipped cream causes the texture to become grainy once thawed.
How do I stop the graham cracker crust from falling apart?
Press the crumbs firmly into the dish using a measuring cup. Freezing the crust for 10 minutes before adding the filling creates a butter barrier that keeps the base intact.
How do I make the strawberry topping?
Toss sliced strawberries with granulated sugar and lemon juice. Let them sit for 10 minutes to allow a natural syrup to form before spooning them over the cream cheese layer.
Can I substitute the cream cheese filling for something lighter?
Yes, you can use a whipped cream base. If you enjoyed the airy texture of the stabilized cream here, see how we use a similar light profile in our strawberry ice cream cake.
Strawberry Dream Dessert