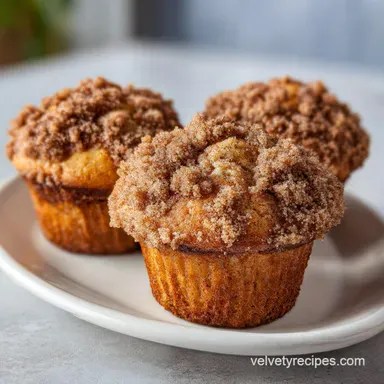
Coffee Cake Banana Muffins: Golden and Bakery-Style
- Time:15 minutes active + 20 minutes baking = Total 35 minutes
- Flavor/Texture Hook: Buttery, cinnamon sugar crunch with a velvety center
- Perfect for: Lazy Sunday brunches or a quick morning treat
- The Secret to Coffee Cake Banana Muffins
- Quick Guide to Baking
- Why This Works
- The Ingredient Rundown
- Necessary Kitchen Tools
- Bringing the Batter Together
- Fixing Common Baking Flops
- Troubleshooting Common Issues
- Customizing Your Muffins
- Truth About Baking Myths
- Storage and Waste Tips
- Best Side Pairings
- Recipe FAQs
- 📝 Recipe Card
The Secret to Coffee Cake Banana Muffins
That first crackle of the cinnamon streusel as it hits the heat is everything. You know that smell, right? The one that fills the whole house and makes everyone wander into the kitchen asking what's baking. For me, it's the smell of a Saturday morning.
I remember trying to mimic those fancy bakery muffins years ago, only to end up with flat, sad little cakes that looked more like hockey pucks than breakfast treats.
I used to think the secret was just adding more sugar or maybe more baking powder. But honestly, the real trick is in the heat. I spent a whole autumn experimenting with oven temperatures, and that's when I realized that a single, steady temperature isn't enough.
You need a shock to the system to get those high, proud tops that we all love.
These aren't your standard, healthy ish banana muffins. We're talking about a buttery, rich treat that feels like a slice of coffee cake but in a handheld form. It's all about the contrast - the shatter of the sugar crust against the moist, velvety crumb of the banana batter.
Trust me on this, once you try the two temperature method, you'll never go back to the standard way.
Quick Guide to Baking
Before we get into the grit of the batter, let's talk about the "when." Baking is basically just a timed chemical reaction, and if you miss your window, you lose your texture. The most critical part of this process is the temperature shift.
Most people just set the oven to 350°F and hope for the best. But if you want that bakery style dome, you have to start hot. This initial blast of heat creates a rapid rise, pushing the batter upward before the structure sets.
If you stay at a low temperature the whole time, the muffins rise slowly and often flatten out.
| Bake Stage | Oven Temp | Duration | Visual Cue |
|---|---|---|---|
| The Initial Blast | 425°F | 5 minutes | Batter begins to puff upward |
| The Slow Set | 350°F | 15 minutes | Golden brown, toothpick clean |
| The Cool Down | Room Temp | 5 minutes | Edges pull slightly from liner |
By splitting the bake, we ensure the outside is set and the topping is crisp, but the inside stays tender. It's a bit more work to turn the dial halfway through, but the results are a total shift in quality.
Why This Works
I've always been curious about why some muffins feel like sponges and others feel like cake. After a lot of trial and error, I found it comes down to a few specific interactions in the bowl.
The Heat Shock: Starting at 425°F creates a sudden burst of steam and carbon dioxide, forcing the muffin to "spring" upward rapidly.
Cold Butter Rub: Using cold, cubed butter for the streusel ensures the fat doesn't melt immediately, leaving little pockets of butter that create a sandy, crumbly texture.
Banana Hydration: Overripe bananas provide not just sweetness, but a specific type of moisture that keeps the crumb velvety without making it gummy.
Double Leavening: Using both baking soda and baking powder provides two stages of lift - one immediate and one that continues as the muffins bake.
The Ingredient Rundown
Right then, let's look at what we're actually putting in the bowl. Don't go for the "perfect" yellow bananas here. You want the ones that look like they've given up on life - brown, spotted, and smelling intensely sweet.
Component Analysis
| Ingredient | Science Role | Pro Secret |
|---|---|---|
| Overripe Bananas | Moisture & Sugar | Mash them until almost liquid for a smoother crumb |
| Cold Butter | Structural Fat | Keep it in the fridge until the very second you rub it in |
| Baking Soda | pH Balancer | Reacts with banana acids for an immediate lift |
| Cinnamon | Aroma Compound | Use a fresh jar; old cinnamon loses its "punch" |
It's a simple list, but the quality of the butter and the ripeness of the fruit do the heavy lifting here. Honestly, don't even bother with low-fat butter; you need the full fat for that bakery quality mouthfeel.
The Essentials List
For the Cinnamon Streusel:
- 1/2 cup (65g) all purpose flourWhy this? Provides the base structure for the crumbs
- 1/2 cup (100g) light brown sugar, packedWhy this? Molasses notes add depth to the topping
- 1 tsp (2g) ground cinnamonWhy this? Classic warmth and aroma
- 4 tbsp (56g) unsalted butter, cold and cubedWhy this? Creates the distinct "crumb" texture
For the Banana Batter:
- 1 1/2 cups (190g) all purpose flourWhy this? Standard protein level for a tender cake
- 1 tsp (4g) baking sodaWhy this? Neutralizes acids and creates lift
- 1 tsp (4g) baking powderWhy this? Ensures a consistent, high rise
- 1/2 tsp (3g) saltWhy this? Cuts through the sugar for balance
- 3 large (150g) overripe bananas, mashedWhy this? Natural sweetness and velvety moisture
- 1/2 cup (115g) unsalted butter, melted and cooledWhy this? Adds richness and a tender crumb
- 3/4 cup (150g) granulated sugarWhy this? Crisp edges and sweetness
- 1 large (50g) egg, room temperatureWhy this? Binds the batter and adds structure
- 1 tsp (5ml) vanilla extractWhy this? Enhances the banana flavor
| Original Ingredient | Substitute | Why It Works |
|---|---|---|
| All Purpose Flour | Whole Wheat Flour | Heartier taste. Note: Heavier crumb, may need 1 tbsp more milk |
| Unsalted Butter | Coconut Oil | Same fat ratio. Note: Adds a slight coconut flavor |
| Granulated Sugar | Coconut Sugar | Similar sweetness. Note: Result is darker and slightly earthier |
| Large Egg | Flax Egg (1 tbsp flax + 3 tbsp water) | Binder. Note: Slightly denser texture, less lift |
If you're looking for something with a different fruit profile, you might enjoy my Hawaiian Banana Bread, which leans into those tropical notes.
Necessary Kitchen Tools
You don't need a professional kitchen to pull this off, but a few specific tools make the process way smoother. I've found that using the right bowl for the right task prevents the "over mix" disaster.
First, grab two mixing bowls - one medium for the streusel and one large for the batter. If you try to do everything in one bowl, you'll end up with a messy slurry instead of a distinct crumb topping.
A sturdy spatula is non negotiable here; you need something that can fold the flour into the wet ingredients without beating the air out of the batter.
For the bananas, a fork works, but a potato masher is a total lifesaver if you're doing this often. You want those bananas smooth, but a few tiny lumps are actually fine - they become little pockets of concentrated banana flavor in the finished muffin.
Bringing the Batter Together
Let's crack on with the actual process. I like to break this down into three phases so I don't get overwhelmed. The goal is to keep the streusel cold and the batter gently mixed.
Phase 1: Crafting the Crumb
Start by grabbing your medium bowl. Whisk together the 1/2 cup flour, brown sugar, and cinnamon. Now, here is the part where you have to be tactile. Drop in those cold, cubed butter pieces. Use your fingertips or a fork to rub the butter into the flour.
You're looking for "pea sized clumps." If the butter starts to melt because your hands are too warm, just pop the bowl in the fridge for 10 minutes. Once it looks like wet sand with some little pebbles in it, put the whole bowl in the fridge.
Keeping this cold is what prevents the streusel from just disappearing into the batter during the bake.
Phase 2: Mixing the Batter
Preheat your oven to 425°F (218°C). While that's heating up, whisk your dry ingredients (1 1/2 cups flour, baking soda, baking powder, and salt) in the large bowl.
In a separate bowl, combine your mashed bananas, melted (and cooled!) butter, granulated sugar, egg, and vanilla. Whisk this until it's smooth and glossy. Now, here is the danger zone: fold the wet ingredients into the dry. Use your spatula and move in a circular motion, scraping the bottom.
Stop the second you don't see any more streaks of flour. If you keep mixing, you'll develop the gluten and end up with a tough, rubbery muffin.
Phase 3: The Two Temp Bake
Fill your muffin liners nearly to the top. Don't be shy - fill them high! Then, take that chilled cinnamon streusel from the fridge and heap it generously over the top.
Slide them into the oven at 425°F (218°C) for exactly 5 minutes. You'll see them start to puff up. Now, quickly turn the oven down to 350°F (175°C) and bake for another 15 minutes.
Use a toothpick to check the center; it should come out clean or with just a few moist crumbs. Let them rest in the pan for 5 minutes before moving them to a wire rack.
Chef's Note: To get a truly professional finish, don't level the streusel. Leave it in little mounds. The uneven surface creates those crispy "peaks" that make the muffins look like they came from a bakery.
Fixing Common Baking Flops
Even for those of us who bake all the time, things can go sideways. Maybe the tops sank, or maybe they feel a bit gummy. It usually comes down to one of three things: temperature, mixing, or fruit moisture.
Troubleshooting Common Issues
| Issue | Solution |
|---|---|
| Why Your Muffins Sank | If your muffins rose beautifully and then collapsed into a crater, it's usually a sign of over leavening or opening the oven door too early. When you let cold air in during that first 5 minute blast, |
| Why the Texture is Gummy | Gummy muffins are almost always the result of over mixing. When you stir the batter too much, you create too many gluten bonds, which traps the moisture in a way that feels dense rather than fluffy. O |
| Why the Topping Melted | If your streusel turned into a thin, sugary glaze instead of a crumbly topping, your butter was likely too warm. If the butter is soft when it hits the oven, it melts instantly and blends into the bat |
Customizing Your Muffins
The beauty of this recipe is that it's a great base. Once you've mastered the classic Coffee Cake Banana Muffins, you can start playing with the additions.
If you want a bit of a crunch, add 1/2 cup of chopped walnuts or pecans to the batter. I find that walnuts pair especially well with the cinnamon in the streusel. For a bit of a twist, you could add a handful of dark chocolate chips, which creates a lovely contrast with the banana.
If you're looking for a healthier version, you can swap the granulated sugar for a coconut sugar or a monk fruit sweetener, though you might lose a little bit of that "shatter" on the edges. For something more indulgent, try adding a tablespoon of sour cream to the wet ingredients for an even more velvety crumb.
If you love this kind of treat, you might also want to try my Chocolate Fudge Bread for a more decadent dessert option.
Adjusting for Batch Size
When you're baking for a crowd, you can't just double everything and hope for the best. Baking is about ratios.
Scaling Down (Half Batch - 6 Muffins): Use 3/4 cup flour for the batter and 1/4 cup for the streusel. Since you can't easily halve an egg, beat one egg in a small bowl and use exactly 2 tablespoons of it.
Reduce your bake time by about 20% and start checking for doneness at 12 minutes during the second phase.
Scaling Up (Double Batch - 24 Muffins): Double the flour and sugars, but only increase the baking soda and powder by 1.5x. Too much leavening in a large batch can cause the muffins to rise too fast and then collapse. Work in batches if your oven can't fit two pans with enough airflow between them.
Truth About Baking Myths
There are a lot of "rules" in baking that aren't actually rules. Let's clear a few things up so you can stop stressing about the small stuff.
Myth: You must sift your flour for muffins. Truth: Unless you're making a delicate sponge cake, sifting isn't necessary. A good whisking of the dry ingredients breaks up the lumps just fine.
Myth: Cold eggs ruin the batter. Truth: While room temperature eggs are better for emulsification, a cold egg won't ruin a banana muffin. The melted butter is the more critical temperature component here.
Myth: You can't freeze muffins. Truth: Not only can you freeze them, but they often taste better after a quick re toast. The freezer preserves the moisture of the banana perfectly.
Storage and Waste Tips
To keep that streusel from getting soft, storage is key. If you leave them in a sealed plastic container while they're still slightly warm, the steam will turn your crispy topping into a soggy mess.
Fridge and Freezer: Store them in an airtight container in the fridge for up to 5 days. For the freezer, wrap each muffin individually in foil and place them in a freezer bag for up to 3 months. To reheat, pop them in a 350°F oven for 5-8 minutes.
This restores the shatter of the topping.
Zero Waste Kitchen: Don't throw away the banana peels! You can freeze them and use them to make a banana peel tea or compost them for your garden. If you have leftover streusel, don't toss it. Sprinkle it over some Greek yogurt or oatmeal the next morning for a little bit of that cinnamon sugar crunch.
Best Side Pairings
These muffins are rich, so you want to pair them with something that cuts through the butter. A sharp, black coffee is the obvious choice, but a cold glass of almond milk or a tart orange juice also works brilliantly.
For a full brunch spread, I love serving these alongside some fresh berries and a savory egg dish. If you're feeling extra fancy, serve a warmed muffin with a small dollop of salted butter on top. The heat melts the butter into the streusel, making it taste almost like a pastry.
If you're hosting a group and want a variety of sweet treats, these pair wonderfully with a slice of Chocolate Fudge Bread for those who prefer something more cocoa forward. It creates a great balance of fruit and chocolate on the table.
Recipe FAQs
Can I use yellow bananas instead of overripe ones?
No, stick with overripe bananas. They provide the necessary sweetness and moisture required for the correct crumb and flavor.
Why did my muffins sink in the middle?
Avoid opening the oven door too early. Letting cold air in during the initial 5-minute blast at 425°F can cause the structure to collapse.
How to prevent a gummy texture in the muffins?
Fold the wet and dry ingredients until just combined. Over mixing creates too many gluten bonds, leading to a dense result. If you enjoyed mastering this gentle folding technique, see how it works in these cinnamon sugar bars.
Is it true I should stir the batter until it is completely smooth?
No, this is a common misconception. Stirring until smooth over works the flour and ruins the fluffiness of the muffin.
How to keep the streusel topping from getting soft?
Cool the muffins completely before storing. Sealing them in a container while they are still warm traps steam, which turns the crispy topping soggy.
Can these muffins be frozen?
Yes, they freeze well. Wrap each muffin individually in foil and place them in a freezer bag for up to 3 months.
How to reheat frozen muffins?
Bake at 350°F for 5 to 8 minutes. This process restores the shatter and crunch of the cinnamon streusel.
Coffee Cake Banana Muffins