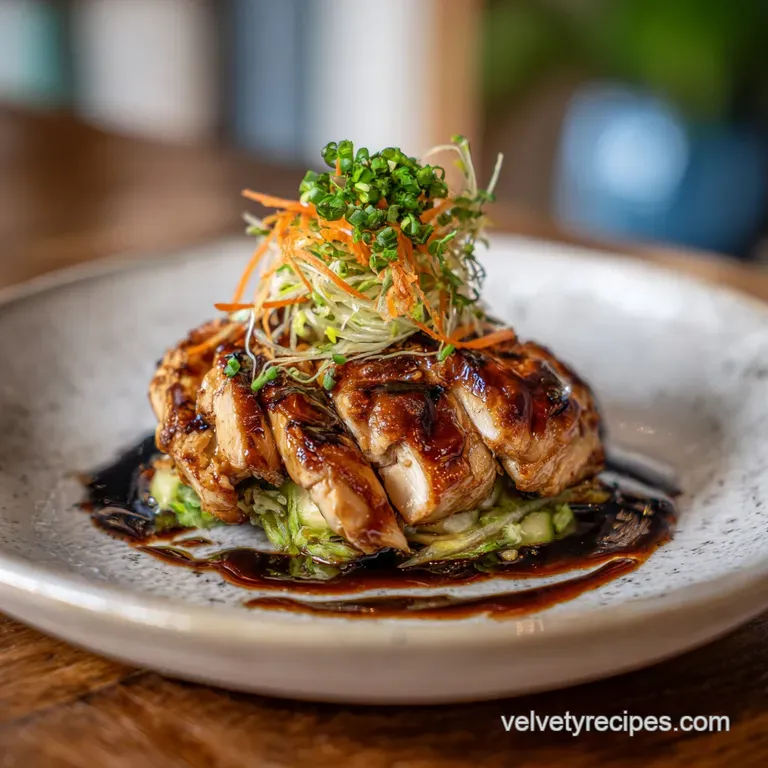
Hibachi Chicken: Tender and Golden
- Time: Active 10 minutes, Passive 10 minutes, Total 20 minutes
- Flavor/Texture Hook: Golden seared exterior with a velvety, buttery soy glaze
- Perfect for: Fast weeknight dinners or meal prep for the busy home cook
- Recreate the Steakhouse with Hibachi Chicken
- Why the Glossy Glaze Sticks
- Crucial Recipe Times and Numbers
- Sourcing the Very Best Ingredients
- Essential Tools for Better Searing
- Cooking Every Bite to Perfection
- Fixing Common Flavor and Texture
- Fun Ways to Change Flavors
- Proper Storage and Reheating Tips
- Best Sides for This Meal
- Very High in Sodium
- Recipe FAQs
- 📝 Recipe Card
Recreate the Steakhouse with Hibachi Chicken
Have you ever wondered why the chicken at those Japanese steakhouses tastes so much more satisfying than the usual stir fry we make at home? It is not just about the giant onion volcanoes or the fancy spatula flips.
There is a specific, almost hidden magic in the way they handle heat and fat that makes the chicken feel like a million dollars. I remember sitting at a hibachi grill years ago, watching the chef toss a massive knob of cold butter onto the hot flat top at the very last second. That one move changed everything.
The secret to a great Hibachi Chicken is not a long list of complicated steps. It is about how you treat the meat in the pan and how you finish the sauce. We are looking for that specific golden crust that only comes from a screaming hot pan and enough patience to leave the meat alone for a few minutes.
Most home cooks move the food around too much, which just steams the meat instead of searing it. We want that sizzle to mean something.
This recipe is designed for the busy home cook who wants that restaurant quality flavor without needing a giant flat top grill in their backyard. We are going to use a simple skillet and basic pantry staples to get a result that is savory, slightly sweet, and incredibly juicy.
If you have twenty minutes and a good appetite, you are already halfway there. Trust me, once you see how that cold butter emulsifies with the soy sauce and lemon juice, you will never want to order takeout again.
Why the Glossy Glaze Sticks
Understanding a few basic concepts will help you get the best results every time you stand at the stove. It is not about being a scientist, but about knowing how heat and ingredients talk to each other.
- The Cold Butter Emulsion: Adding cold butter to a hot sauce creates a creamy, stable suspension that coats the meat. If the butter were warm or melted, it would just turn into an oily puddle instead of a thick glaze.
- Surface Dryness for Searing: Any moisture on the outside of the chicken acts as a barrier to browning. By patting the meat dry, we ensure the heat goes straight into creating that golden brown crust rather than evaporating water.
- Deglazing for Umami: When the soy sauce and mirin hit the hot pan, they lift up all those flavorful brown bits stuck to the bottom. These bits contain concentrated savory notes that get re incorporated into the final sauce.
- Carryover Cooking Timing: Chicken continues to cook for a minute or two after leaving the heat. Pulling it just as it finishes ensures it stays tender rather than becoming dry or rubbery.
| Cooking Method | Cook Time | Texture Result | Best For |
|---|---|---|---|
| Large Cast Iron | 7-8 minutes | Deep amber crust | Maximum flavor |
| Stainless Steel | 8-10 minutes | Even browning | Easy cleanup |
| Non Stick Pan | 10-12 minutes | Softer exterior | Beginner cooks |
| Outdoor Griddle | 6-7 minutes | Authentic char | Large batches |
Choosing the right pan is the first step toward success. While a cast iron skillet is my personal favorite for getting those crispy edges, a heavy bottomed stainless steel pan also does a fantastic job of building up the "fond" (those delicious brown bits) that makes the sauce so rich.
Crucial Recipe Times and Numbers
To get this dish right, we need to focus on precision. Even though it is a quick meal, the difference between "good" and "million dollar quality" lies in the details of the timing and the temperature of your pan.
| Ingredient | Science Role | Pro Secret |
|---|---|---|
| Chicken Breast | Lean Protein | Cut across the grain for maximum tenderness in every bite. |
| Unsalted Butter | Fat & Emulsifier | Keep it in the fridge until the very second you need it. |
| Fresh Lemon Juice | Acid Balance | It cuts through the salt of the soy sauce to brighten the dish. |
| Mirin | Sugar & Shine | This provides the glossy look and a subtle sweetness that balances the salt. |
The interaction between the soy sauce and the cold butter is what creates the "hibachi" feel. The lemon juice might seem like a small addition, but it is the secret ingredient that keeps the rich butter from feeling too heavy. It provides a necessary "snap" to the flavor profile.
Sourcing the Very Best Ingredients
For a recipe with so few components, the quality of what you put in really matters. I always tell my friends that if you use the cheap stuff here, you will taste it. We want bold, clean flavors that stand up to high heat.
- Chicken Breast (1.5 lb): Look for air chilled chicken if you can find it. It has less water content, which means it sears much better. Why this? Air chilled chicken doesn't release as much liquid, preventing the meat from steaming.
- Neutral Oil (1 tbsp): Use avocado or grapeseed oil. These have high smoke points. Why this? High smoke points prevent the oil from burning and turning bitter at high heat.
- Kosher Salt & Black Pepper (0.5 tsp each): Basic but essential. Why this? Coarse salt provides a better crust and more controlled seasoning than table salt.
- Unsalted Butter (2 tbsp): It must be cold and cubed. Why this? Cold butter creates a thicker, glossier emulsion when tossed into the hot pan.
- Soy Sauce (3 tbsp): Use a high-quality naturally brewed soy sauce. Why this? It provides the foundational salty, savory umami that defines the entire dish.
- Mirin (1 tbsp): This is a Japanese sweet rice wine. Why this? It adds sweetness and a beautiful sheen that sugar alone cannot replicate.
- Toasted Sesame Oil (1 tsp): A little goes a long way for aroma. Why this? Toasted oil has a deep nutty flavor that rounds out the savory sauce.
- Fresh Lemon Juice (1 tbsp): Use a real lemon, not the bottled stuff. Why this? Fresh acid provides a sharp, clean finish that lifts the heavy fats.
- Garlic & Ginger (3 cloves/1 tsp): The aromatic backbone. Why this? Freshly grated ginger and minced garlic offer a punch of heat and fragrance.
- Sesame Seeds & Green Onions: For the final garnish. Why this? They add texture, visual appeal, and a fresh bite to the finished plate.
| Original Ingredient | Substitute | Why It Works |
|---|---|---|
| Mirin | Dry Sherry + 0.5 tsp sugar | Similar acidity and sweetness. Note: Sherry is more alcoholic, so cook it well. |
| Soy Sauce | Tamari | gluten-free and very similar in flavor profile. |
| Avocado Oil | Canola Oil | Both have high smoke points and neutral flavors. |
| Fresh Ginger | Ginger Paste | Convenient and provides a very similar flavor without the grating. |
If you are looking for a way to use up extra chicken later in the week, this flavor profile is actually quite versatile. This reminds me of my ricotta chicken recipe which also relies on high heat for texture, though that one leans more into Mediterranean flavors. Both techniques focus on maintaining the integrity of the protein.
Essential Tools for Better Searing
You do not need a kitchen full of gadgets to make a great Hibachi Chicken, but a couple of specific items will make your life a lot easier. The goal is heat retention and space.
First and foremost, a large cast iron skillet is the gold standard here. It holds onto heat like a champ, which is exactly what you need when you drop a pound and a half of cold meat into it. If the pan temperature drops too much, the chicken will just sit there and gray instead of getting that beautiful brown sear.
A carbon steel wok is another great option if you are comfortable working with one, as it allows for quick tossing.
Next,, a good set of tongs is better than a spatula for this recipe. You want to be able to grab individual pieces of chicken to flip them and ensure every side hits the hot metal. Finally, a microplane or a fine grater is essential for the ginger.
You want the ginger to be a fine paste so it dissolves into the sauce rather than leaving you with woody chunks to chew on.
Cooking Every Bite to Perfection

- Pat the chicken breast completely dry with paper towels. Note: Dry surface equals better crust. Cut the chicken into uniform 1 inch cubes for even cooking.
- Place a large cast iron skillet over medium high heat. Wait until you see wisps of smoke. Add the neutral oil.
- Add the chicken cubes in a single layer. Do not crowd them. Season with the salt and pepper.
- Let the chicken sear undisturbed for 3 minutes until a deep golden brown crust forms.
- Flip the chicken pieces. Continue searing for another 3-4 minutes until the meat is opaque and firm.
- Reduce the heat to medium. Move the chicken to the edges and drop the garlic and ginger into the center.
- Sauté the aromatics for 30 seconds until the scent of garlic fills the kitchen.
- Pour in the soy sauce, mirin, sesame oil, and lemon juice. Stir until the liquid starts to bubble and thicken.
- Add the cold, cubed butter. Toss the chicken continuously until the butter melts into a glossy, thick glaze.
- Remove from the heat immediately. Garnish with sesame seeds and green onions until the dish looks vibrant and fresh.
Chef's Tip: If you want an even deeper flavor, let the chicken sit in the pan for an extra 30 seconds after adding the soy sauce but before the butter. This allows the soy to slightly caramelize against the hot metal.
Fixing Common Flavor and Texture
Even with the best intentions, things can sometimes go sideways in the kitchen. The most common issues with Hibachi Chicken usually come down to heat management or moisture control.
Why Your Chicken Is Tough
If your chicken feels like chewing on a rubber band, it is almost certainly overcooked. Chicken breast is very lean, and once it passes its ideal temperature, the fibers tighten up and squeeze out all the juice.
This can also happen if you cut the pieces too small; they cook through before the outside has a chance to brown.
Why the Sauce Is Greasy
A greasy sauce usually happens because the butter was added too early or it wasn't cold enough. When butter is tossed into a pan that is too hot without being stirred constantly, the milk solids separate from the fat, leaving you with an oily mess.
The goal is to create a "mount," which is a fancy way of saying we are thickening the sauce with cold fat.
| Problem | Root Cause | Solution |
|---|---|---|
| Pale Chicken | Pan not hot enough | Wait for the oil to shimmer and smoke slightly before adding meat. |
| Salty Sauce | Too much soy reduction | Add a splash of water or more lemon juice to balance the salt. |
| Burnt Garlic | Added too early | Only add aromatics once the heat is reduced and the meat is mostly done. |
Common Mistakes Checklist
- ✓ Pat chicken completely dry with paper towels (prevents steaming).
- ✓ Preheat the pan for at least 3 full minutes before adding the oil.
- ✓ Don't overcrowd the pan; if your skillet is small, cook in two batches.
- ✓ Keep the butter in the refrigerator until the very moment it's called for.
- ✓ Use a high smoke point oil like avocado oil rather than extra virgin olive oil.
- ✓ Let the chicken sear undisturbed; resist the urge to shake the pan constantly.
If you find yourself with extra chicken that you accidentally overcooked, don't worry. It works great in a creamy soup the next day where the broth can help rehydrate the meat fibers.
Fun Ways to Change Flavors
Once you have the basic technique down, you can start playing with the ingredients to suit your mood or what is in your fridge. The "hibachi" style is more of a method than a strict rulebook.
Swapping for Hibachi Chicken Thighs
If you find chicken breast too finicky, try using boneless, skinless chicken thighs. They have a higher fat content, which makes them much more forgiving if they stay in the pan a minute too long. They also have a deeper, richer flavor that pairs beautifully with the soy and ginger glaze.
Just be aware that thighs may take an extra minute or two to cook through.
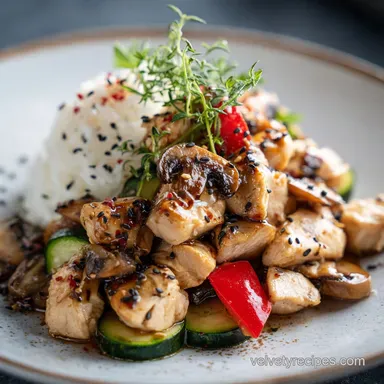
Incorporating Hibachi Vegetables
To make this a full meal, you can toss in some sliced zucchini, onions, and mushrooms. I usually cook the vegetables separately first, then remove them and cook the chicken. At the very end, when you are adding the butter and sauce, toss the vegetables back in to coat them in that glossy goodness.
This keeps the vegetables from getting mushy while the chicken sears.
Making it Spicy
While traditional hibachi is savory and mild, a little heat can be a great addition. I love adding a teaspoon of chili garlic sauce or a pinch of red pepper flakes when I add the garlic and ginger. It provides a back of-the throat warmth that works perfectly with the sweetness of the mirin.
Proper Storage and Reheating Tips
Hibachi Chicken is one of those rare dishes that actually holds up pretty well for meal prep, provided you don't overcook it during the initial run.
Storage: Place any leftovers in an airtight container as soon as they have cooled to room temperature. They will stay fresh in the refrigerator for up to 3 or 4 days.
I don't recommend freezing this dish, as the delicate butter emulsion will likely break upon thawing, leaving the chicken with a greasy texture.
Reheating: The microwave is the enemy of juicy chicken. If you can, reheat the chicken in a small skillet over medium low heat. Add a tiny splash of water or chicken broth and cover the pan with a lid. This creates a little steam that gently warms the meat without drying it out further.
If you must use a microwave, use 50% power and heat in 30 second intervals.
Zero Waste: If you have leftover sauce in the pan, don't wash it away! Toss in some pre cooked rice or even some leftover pasta to soak up those buttery, garlicky flavors. The green onion tops can be placed in a jar of water on your windowsill to regrow, giving you a perpetual supply of garnish.
Best Sides for This Meal
To really get that restaurant experience, you have to think about what goes alongside the chicken. While a simple bowl of steamed white rice is classic, there are a few other ways to round out the plate.
Hibachi Chicken and Rice
Fried rice is the natural partner here. You can make a quick version by sautéing cold, day old rice with a little butter, soy sauce, and a scrambled egg. The key is using cold rice so it stays fluffy rather than getting gummy.
If you want to keep things lighter, cauliflower rice sautéed with the same aromatics (garlic and ginger) is a fantastic low carb alternative.
The Essential Dip
No hibachi meal is complete without "yum yum sauce." It is that pinkish, creamy sauce that everyone craves. You can make a quick version at home by whisking together mayonnaise, tomato paste, a little melted butter, garlic powder, and a pinch of sugar and paprika.
Let it sit in the fridge for an hour before serving so the flavors can meld. It provides a cool, creamy contrast to the hot, salty chicken.
- If you want a crispier crust, use a cast iron pan and do not move the chicken for the first 3 minutes.
- If you want a thicker sauce, whisk half a teaspoon of cornstarch into the soy sauce before adding it to the pan.
- If you want a lighter meal, serve the chicken over a bed of shredded cabbage or power greens.
Cooking this at home is all about confidence and heat. Don't be afraid of a little smoke from the pan that is just the flavor developing. Keep your butter cold, your pan hot, and your ginger fresh, and you will be eating a meal that tastes like it came straight off a professional grill. Enjoy the sizzle!

Very High in Sodium
1085 mg of sodium per serving (47% of daily value)
The American Heart Association recommends limiting sodium intake to less than 2,300 mg per day, with an ideal limit of less than 1,500 mg per day for most adults.
Tips to Reduce Sodium
-
Low-Sodium Soy Sauce-25%
Replace 3 tbsp soy sauce with low-sodium soy sauce or tamari. This is the biggest contributor of sodium in this recipe.
-
Reduce Added Salt-20%
Omit the 0.5 tsp kosher salt. You can add it back in tiny increments if needed after tasting, but the soy sauce and other ingredients will provide plenty of flavor.
-
Boost Acidity and Aromatics-5%
Increase the lemon juice to 2 tbsp and add an extra clove of garlic and a bit more ginger. This enhances flavor without adding sodium.
-
Flavorful Herbs & Spices
Explore using a variety of dried herbs and spices like garlic powder, onion powder, paprika, or chili flakes. They add depth and complexity to dishes without sodium.
-
Mindful Toasted Sesame Oil-5%
While toasted sesame oil adds great flavor, it can also contain sodium. Use 1 tsp toasted sesame oil, ensuring it's unsalted if possible, or slightly reduce the amount.
Recipe FAQs
What is hibachi chicken made of?
It consists of chicken breast, aromatics, and a savory glaze. The base uses 1.5 lbs of cubed chicken breast, neutral oil, salt, pepper, garlic, ginger, soy sauce, mirin, sesame oil, lemon juice, and cold cubed butter.
What is the difference between hibachi chicken and teriyaki chicken?
Hibachi focuses on a fast, high heat sear and a butter emulsified sauce. Teriyaki typically relies on a thicker, sugar heavy glaze that is simmered longer, whereas the hibachi method creates a lighter, glossier coating.
What do hibachi chefs squirt on chicken?
They use a blend of soy sauce, mirin, and lemon juice. This liquid mixture deglazes the pan and provides the acidic brightness needed to balance the richness of the butter added at the end of the cooking process.
What is hibachi flavor?
It is defined by the Maillard reaction from high heat searing followed by a savory acidic emulsified finish. If you enjoyed learning how to develop this golden brown crust here, you can apply those same high heat searing principles to other protein dishes for better depth of flavor.
How to prevent hibachi chicken from tasting steamed?
Pat the chicken completely dry with paper towels before seasoning. Additionally, ensure your skillet is preheated for at least three minutes and avoid overcrowding the pan, which prevents the meat from releasing too much moisture at once.
How to get the perfect glossy glaze on the chicken?
Add cold, cubed butter to the pan once the heat is reduced and toss continuously. The rapid agitation emulsifies the butter with the soy sauce and lemon juice mixture, creating a stable, silky sauce that clings to the meat.
Is it true I should use extra virgin olive oil for a better sear?
No, this is a common misconception. Extra virgin olive oil has a low smoke point and will burn at the high temperatures required for this recipe; always use a neutral oil like avocado or grapeseed instead.
Easy Hibachi Chicken
Ingredients:
Instructions:
Nutrition Facts:
| Calories | 328 kcal |
|---|---|
| Protein | 40.8 g |
| Fat | 15.7 g |
| Carbs | 4.2 g |
| Fiber | 0.4 g |
| Sugar | 2.1 g |
| Sodium | 1085 mg |
