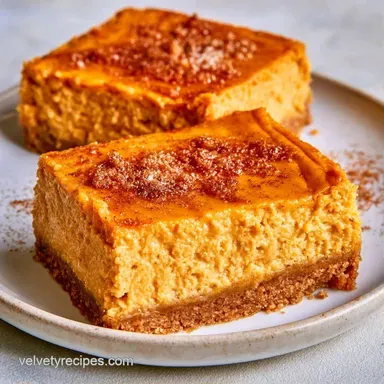
Pumpkin Cheesecake Bars with Gingersnap Crust
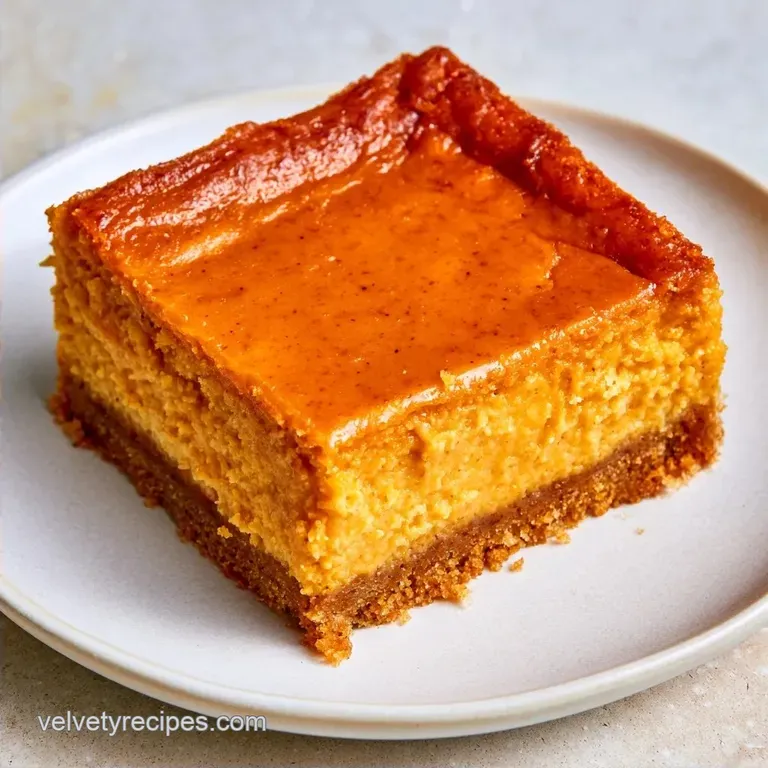
- Time: 20 minutes of prep and 4 hours in the fridge
- The Vibe: Zesty cream cheese blended with spiced pumpkin atop a crunchy gingersnap crust
- Best for: Autumn gatherings or an effortless holiday treat
The aroma of toasted gingersnaps wafting through the oven is sheer magic. It’s the ultimate signal that fall has officially taken over the kitchen. I used to bake entire cheesecakes, but they always seemed overly complicated for a random weekday.
I craved a dessert that was easy to slice into squares and serve on a platter. These bars offer that same thick, velvety richness while being much simpler to manage. Every bite balances the gingersnap snap, the cheesecake's tang, and the earthy warmth of pumpkin.
You'll end up with a treat that looks sophisticated but is incredibly straightforward to put together. The magic of these Pumpkin Cheesecake Bars lies in the interplay between the zesty crust and the chilled filling. Once you experience the gingersnap base, standard graham crackers just won't cut it.
Easy Pumpkin Cheesecake Bars Recipe
These bars are a hit because they balance the sweetness of the pumpkin with the acidity of the cream cheese. I've found that using a 9x9 pan makes the layers thick and satisfying.
The result is a chewy yet creamy treat that holds its shape when sliced. It's far less stressful than a traditional cake.
What Each Ingredient Does
The gingersnap crumbs provide a spicy, bold foundation. If you use regular ginger cookies, the flavor is a bit milder, but the snap is still there.
For the cheesecake layer, full fat cream cheese is a must. low-fat versions can make the bars watery or grainy, which ruins the mouthfeel.
The pumpkin puree adds the classic fall earthiness. I always use 100% pure puree, not the pumpkin pie filling, because the filling already has sugar and spices that mess with the balance.
The streusel topping is optional but adds a nice crunch. It's basically a quick crumble that prevents the top from looking too plain.
Tools You'll Need
You only need a few basic items rather than a professional kitchen. A 9x9 inch square baking pan is the standard choice here.
I recommend using parchment paper. By lining the pan with a bit of overhang on the sides, you can easily lift the entire batch of Pumpkin Cheesecake Bars out at once.
Using an electric mixer ensures the cream cheese becomes perfectly smooth. For the swirling effect, a simple knife or toothpick will do the trick.
Making the Bars
Phase 1: The Base
- Preheat your oven to 325°F (160°C). Line a 9x9 inch pan with parchment paper.
- Mix 1.5 cups gingersnap crumbs, 5 tbsp melted butter, and 1 tbsp sugar. Press this firmly into the pan.
- Bake 8-10 minutes until the edges smell toasted and fragrant. Let it cool for a few mins.
Phase 2: The Cheesecake
- Beat 16 oz softened cream cheese and 0.5 cup sugar until smooth. Note: Room temp cheese prevents lumps.
- Mix in 1 tsp vanilla and one egg on low speed.
- Spread this velvety mixture evenly over your cooled crust.
Phase 3: The Pumpkin Swirl
- Whisk 15 oz pumpkin puree, 0.5 cup brown sugar, two eggs, 1 tsp cinnamon, 0.5 tsp ginger, and 0.25 tsp cloves until glossy.
- Dollop the pumpkin batter over the cheesecake layer. Use a toothpick to swirl the two together in a marble pattern.
Phase 4: The Topping and Bake
- Mix 0.5 cup flour, 0.25 cup brown sugar, and 3 tbsp cold cubed butter with a fork until crumbly. Sprinkle this over the top.
- Bake 40-45 minutes until the edges are set but the center still has a slight jiggle.
- Cool in the pan on a wire rack. Refrigerate for at least 4 hours before slicing.
Fixing Common Issues
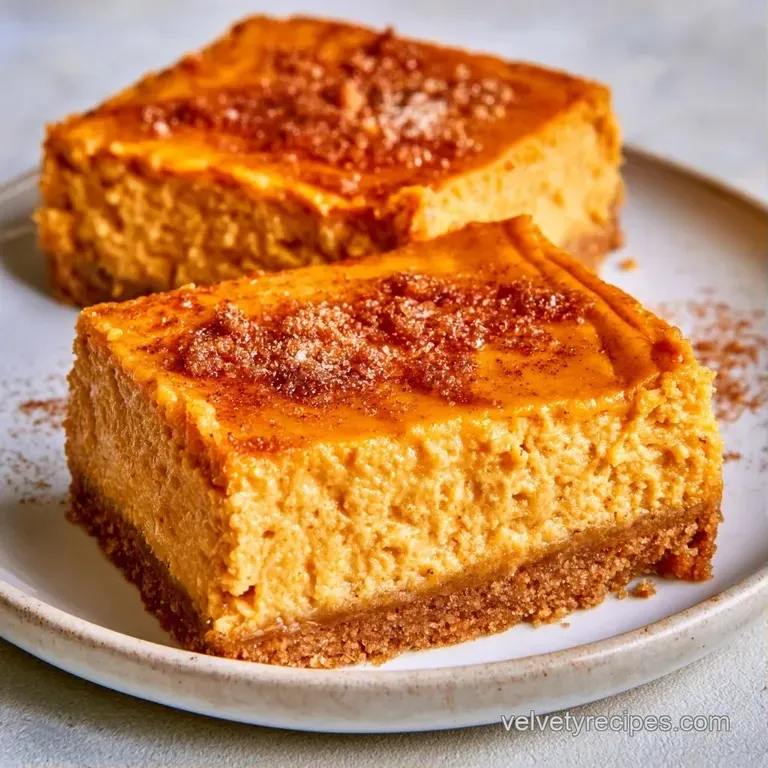
If the top of your Pumpkin Cheesecake Bars cracks, it's usually because of too much air. Beating the eggs on high speed creates bubbles that pop in the oven. Keep the mixer on low once the eggs go in.
A soggy bottom happens if you skip the pre bake. That first 10 minutes in the oven sets the butter and sugar, creating a barrier.
If the filling feels grainy, the cream cheese wasn't soft enough. You can't really fix it once it's baked, so make sure the cheese is truly room temperature before you start.
| Problem | Root Cause | Solution |
|---|---|---|
| Cracked Top | Over mixing eggs | Mix on low speed; don't over beat |
| Soggy Crust | Skipping pre bake | Bake crust 8-10 mins first |
| Grainy Filling | Cold cream cheese | Soften cheese completely before beating |
| Center Too Gooey | Under baked | Bake until edges are firm but center jiggles |
Flavor Twists and Swaps
If you want a different vibe, you can swap the gingersnap crumbs for Biscoff cookies. It gives the Pumpkin Cheesecake Bars a caramelized, cinnamon heavy taste.
For those avoiding gluten, use a gluten-free flour blend in the streusel and ensure your cookies are certified GF. The rest of the recipe is naturally gluten-free.
If you love other fall treats, these pair well with pecan pie bars on a dessert platter.
You can also leave off the streusel entirely if you prefer a cleaner, smoother look on top.
| Original Ingredient | Substitute | Why It Works |
|---|---|---|
| Gingersnaps | Biscoff Cookies | Similar crunch. Note: More caramel flavor, less ginger spice |
| All Purpose Flour | Almond Flour | Nutty flavor. Note: Streusel will be softer and oilier |
| Brown Sugar | Maple Syrup | Earthy sweetness. Note: May make the pumpkin layer slightly runnier |
Storing the Bars
Store your treats in a sealed container in the fridge, where they will stay fresh for about 5 days.
These bars also freeze well. Individually wrap each piece in plastic wrap and store them in a freezer safe bag for 3 months. Let them defrost in the refrigerator overnight before serving.
To reduce waste, save any remaining pumpkin puree. Stir it into your morning oatmeal or whip it into a smoothie with a touch of honey and cinnamon.
If you have leftover gingersnap crumbs, toast them in a pan with a little butter to create a tasty topping for vanilla ice cream.
Best Serving Ideas
To balance the richness of these bars, a touch of acidity works wonders. A spoonful of sour cream or Greek yogurt on the side helps cut through the sweetness.
For an extra indulgent touch, add a dollop of whipped cream and a dusting of cinnamon. They also pair beautifully with a hot cup of coffee or a spiced chai latte.
Because they are so dense, small squares are the ideal size. Use a warm knife to achieve the clean, sharp edges that give these Pumpkin Cheesecake Bars a professional look.
Keep them chilled until you are ready to eat; the texture is far superior when served cold.
Why the Texture Works
Pre-baking the crust is the secret here. This step dries out the sugar and butter, ensuring the cheesecake layer doesn't make the base soggy. It's the same logic behind why a pumpkin pie recipe requires a firm, set crust.
Using room temperature cream cheese is equally important. When the fat is soft, it blends seamlessly with the sugar, eliminating those stubborn little white lumps.
To maintain safety and texture, USDA guidelines suggest keeping cheesecake style treats refrigerated, as the dairy and egg components can spoil if left out.
The Temperature Curve
Baking at 325°F instead of 350°F ensures the center sets before the edges overcook. This gentler heat prevents the pumpkin layer from puffing up and subsequently collapsing.
Avoiding Air Pockets
By swirling the pumpkin and cheese after mixing them separately, you preserve their different densities. This creates distinct ribbons of flavor rather than a single blended orange mass.
The Chill Factor
The 4 hour refrigeration period is about more than just cooling. It allows the fats to solidify, which creates the signature dense, fudge like consistency of the bars.
Myth Busting
You can skip the water bath for these. While water baths prevent cracking in tall, delicate cakes, these shallow bars are perfectly handled by the lower oven temperature.
Some believe beating the eggs on high creates a better "fluffiness." However, fluffiness is undesirable in a cheesecake; keep the mixer speed low to maintain density.
Another misconception is that pumpkin pie filling can replace puree. Avoid this, as the filling contains too much added sugar and water, leaving the bars runny and overly sweet.
Quick Adjustment Guide
- More tang? → Add 1 tsp lemon juice to the cream cheese
- Extra spice? → Add a pinch of nutmeg to the pumpkin mix
- Softer crust? → Reduce pre bake time to 6 minutes
Recipe FAQs
What is a crowd pleasing pumpkin dessert for holidays?
Pumpkin Cheesecake Bars are a top recommendation. They combine a spicy gingersnap crust with a creamy swirl, making them an ideal centerpiece for Thanksgiving.
Is it true that you need high heat to set a pumpkin cheesecake?
No, this is a common misconception. Baking at 325°F (160°C) ensures a creamy, dense texture without cracking the surface.
How to serve these bars for a festive autumn spread?
Arrange the chilled squares on a wooden platter. These pair beautifully with a sweet savory appetizer like a pecan pie dip to create a diverse flavor profile.
Why should the pan be chilled before slicing?
Chilling stabilizes the fats. Refrigerating for at least 4 hours ensures the cream cheese and pumpkin layers are firm enough to yield clean, professional edges.
Pumpkin Cheesecake Bars