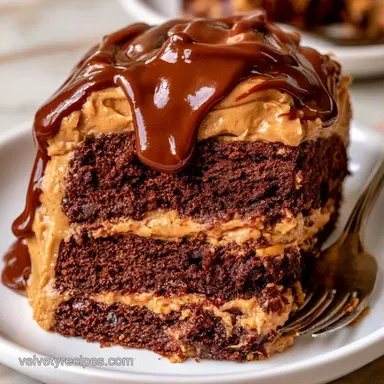
Peanut Butter Chocolate Layer Cake: Fudgy
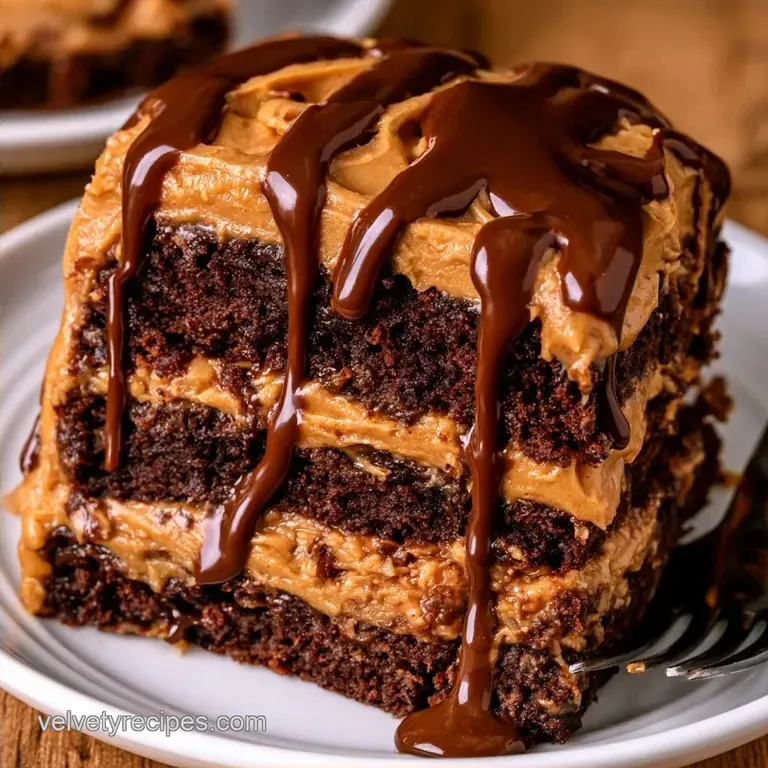
- Time: 30 min hands-on + 2 hours in the refrigerator
- The Vibe: Dense, fudgy chocolate combined with salty peanut butter
- Ideal for: Birthday celebrations or intense chocolate cravings
The Best Peanut Butter Chocolate Layer Cake
Ever wonder why some chocolate cakes taste one-dimensional while others have a deep, complex profile? It typically depends on how the cocoa is handled. Rather than just whisking it into the dry ingredients, using a hot liquid unlocks the full potential of the cocoa solids.
The resulting scent is reminiscent of a gourmet chocolate shop, filled with notes of rich cocoa and toasted nuts. This dessert delivers the nostalgic flavor of a peanut butter cup, transformed into a towering, fudgy layer cake.
The combination of oil and buttermilk ensures the crumb stays moist, unlike the tendency for traditional butter based sponges to dry out. We are creating a decadent treat that strikes a perfect balance between intense dark cocoa and a creamy, salty frosting.
The Logic Behind Flavor
Hot Coffee: The heat blooms the cocoa powder, which releases flavor compounds and makes the chocolate taste darker. You won't taste the coffee, but it gives the cake a mahogany depth similar to my Chocolate Fudge Bread.
Buttermilk: The acid in the buttermilk reacts with the baking soda to create a lighter, more tender crumb. It prevents the cake from becoming too dense or gummy.
Essential Cake Components
The flour and cocoa provide the structure, but the sugar and oil keep things fudgy. I prefer using a standard creamy peanut butter rather than the natural, oily kind for the frosting. Natural peanut butter tends to separate, which can make your frosting grainy or runny.
Buttermilk is a non negotiable here. If you don't have it, you can make a quick version by adding a tablespoon of lemon juice to regular milk and letting it sit for 5 minutes. This mimics the acidity needed to make the cake rise.
For the ganache, use a semi sweet chocolate. Dark chocolate can sometimes overpower the peanut butter, while milk chocolate is often too sweet. Semi sweet hits the middle ground.
Quick Recipe Stats
| Feature | Detail |
|---|---|
| Prep Time | 30 minutes |
| Cook Time | 35 minutes |
| Total Time | 185 minutes |
| Yield | 16 servings |
| Oven Temp | 175°C (350°F) |
Necessary Kitchen Tools
You'll need four 8 inch round cake pans. If you only have two, you can bake in batches, but the batter might lose some lift while waiting. A stand mixer such as KitchenAid makes the frosting much lighter, but a hand mixer works too.
Parchment paper is essential. Grease the pans, then line the bottoms. This ensures the layers slide out without sticking, which is the only way to avoid those heartbreaking cracks in the sponge.
The Baking Process
Layer Prep
Set your oven to 175°C (350°F). Prepare four 8 inch round cake pans by greasing them and lining the bottoms with parchment paper. Note: This prevents the cake from sticking to the base.
Mixing Dry Ingredients
Combine the flour, sugar, cocoa, baking soda, baking powder, and salt in a large mixing bowl. Stir until no clumps remain.
Adding Wet Ingredients
Stir in the buttermilk, oil, eggs, and vanilla. Mix on medium speed until just combined.
The Coffee Step
Gradually pour in the hot brewed coffee and stir until smooth. Distribute the batter evenly among the four pans. Note: The batter will be thin, almost like a heavy cream.
Baking the Layers
Bake for 25-30 minutes until a cake tester poked into the middle comes out with a few moist crumbs. Let them cool in the pans for 10 minutes, then flip onto wire racks to cool completely. You'll notice a strong, toasted chocolate aroma filling the room.
Whipping the Frosting
Beat the softened butter and creamy peanut butter together until smooth. Gradually blend in the powdered sugar, heavy cream, vanilla, and salt until the frosting is light and fluffy.
Assembly
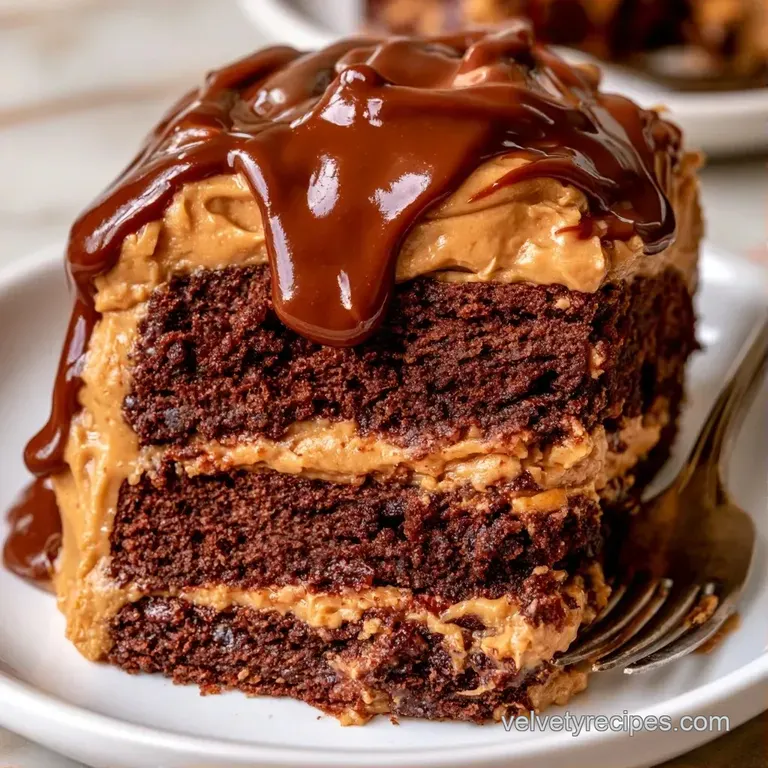
Stack the cooled sponges, spreading the peanut butter frosting between each layer. Coat the exterior of the Peanut Butter Chocolate Layer Cake with the remaining frosting.
Making the Ganache
Warm the heavy cream and pour it over the chopped semi sweet chocolate. Stir until completely smooth.
The Final Drip
Pour the ganache over the top, letting it flow down the sides. This creates a glossy finish.
Chilling Time
Refrigerate the cake for 2 hours before slicing. Note: This sets the frosting and ganache so the layers don't slide.
Common Texture Fixes
Curdled Peanut Butter Frosting
This occurs if your butter is too chilled or the cream is incorporated too quickly. To remedy this, set the bowl over a pot of simmering water for 10 seconds. Whip it again on high speed and it should smooth out.
Sinking Cake Centers
Sinking usually results from a sudden drop in temperature when opening the oven or using too much leavening. If this happens, simply level the top with a serrated knife. The frosting will hide the gap perfectly.
Separating Ganache
If the chocolate looks oily and doesn't melt uniformly, it's likely overheated. Gently stir in a teaspoon of room temperature cream and whisk vigorously until the emulsion comes back together.
Storage and Waste
Keep your cake refrigerated for up to 4 days. Use a cake dome or a large airtight container to ensure the sponge doesn't absorb other odors from the fridge.
To freeze, wrap each cake layer in plastic wrap and foil. They will remain fresh for 3 months. Allow them to thaw in the refrigerator overnight before frosting.
Don't throw away the scraps from leveling the cake. Instead, crumble them into a bowl and mix in a little extra frosting to create cake pops. You can also freeze these pieces to blend into a vanilla milkshake for a quick dessert.
Great Pairing Ideas
This cake is incredibly rich, so you need something to cut through the fat. A tart raspberry coulis or fresh blackberries on the side work wonders. If you're looking for another dessert to serve alongside, a Chocolate Velvet Parfait adds a lighter, creamier contrast.
For drinks, a cold glass of whole milk is the classic choice. If you want something more adult, a glass of tawny port or a bold Cabernet Sauvignon complements the dark chocolate and salt.
Simple Ingredient Swaps
| Original Ingredient | Substitute | Why It Works |
|---|---|---|
| All purpose Flour | Almond Flour | Grain free. Note: Results in a denser, moister crumb |
| Buttermilk | Greek Yogurt + Milk | Similar acidity. Note: Mix 1 part yogurt to 3 parts milk |
| Heavy Cream | Coconut Cream | dairy-free. Note: Adds a slight coconut flavor to the ganache |
| Semi Sweet Chocolate | Dark Chocolate (70%) | Less sweet. Note: Gives the cake a more sophisticated flavor |
Chef's Tip: For a "peanut butter cup" inspired cake, press some crushed peanut butter candies into the frosting between layers. It provides an extra punch of flavor and a bit of crunch.
Quick Adjustments: Want more salt? → stir 1/2 tsp flaky sea salt into the ganache Prefer lighter frosting? → fold in 2 tbsp of whipped cream Need deeper chocolate? → swap 20g of flour for extra cocoa powder
To scale this down to two layers, halve all the ingredients and cut the bake time by roughly 5 minutes. For larger gatherings, I recommend baking in batches rather than doubling the batter in one bowl, as this can compromise the aeration.
Creating a homemade peanut butter chocolate layer cake requires some patience, particularly while it chills, but the result is a rich, fudgy treat that far exceeds store-bought options. Just be sure to let it set properly, or you'll end up with a delicious peanut butter landslide on your plate.
Recipe FAQs
How to make the peanut butter frosting fluffy?
Beat softened butter and creamy peanut butter together until smooth before adding powdered sugar. Gradually mix in the heavy cream and vanilla to reach a light consistency.
Can I replace the hot coffee with boiling water?
Yes, boiling water works as a direct substitute. The hot liquid helps bloom the cocoa powder for a deeper chocolate flavor.
Is it true that I have to chill the cake for hours before cutting?
That's a myth. While chilling for 2 hours helps the ganache set, you can slice it sooner if you don't mind a softer topping.
Why did my cake layers stick to the pan?
This usually happens if the parchment paper isn't properly lined at the bottom. Ensure every pan is greased and lined to allow for easy inversion.
Where should I keep the cake to prevent it from drying out?
Place it under a cake dome or inside a large sealed container. This protects the sponge from absorbing other odors in the refrigerator.
Which oil works best for this chocolate sponge?
Vegetable oil provides the most neutral taste and a moist crumb. If you enjoyed the creamy balance here, you can apply similar fat-ratio logic to our strawberry shortcake.
What makes this a great Halloween dessert?
The rich chocolate and peanut butter profile is a crowd pleaser for parties. You can decorate the ganache with orange candies to fit the theme.
Do I really need room temperature eggs?
Surprisingly, no. Cold eggs will still bake, but room temperature ingredients emulsify better for a smoother batter.
Peanut Butter Chocolate Layer Cake