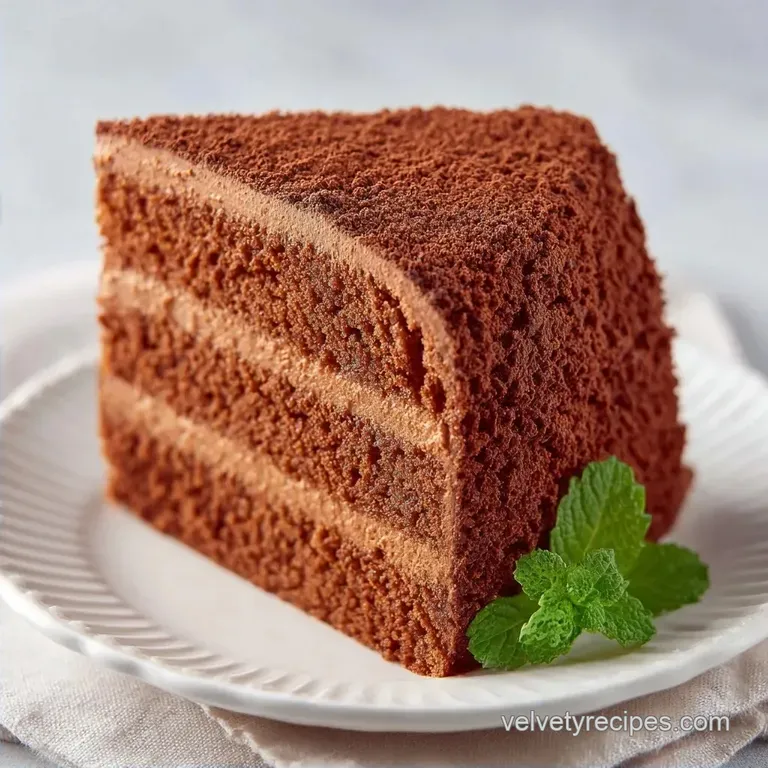
Guilt-Free Chocolate Velvet Sponge Cake: Light and Airy
- Time:15 minutes active + 25 minutes baking
- Flavor/Texture Hook: Rich cocoa with a light, bouncy crumb
- Perfect for: Afternoon tea or a light dinner party dessert
Ever wonder why some chocolate cakes feel like eating a cloud while others feel like a brick? I spent a while trying to figure out why my cakes always turned out too dense, and it usually came down to how I handled the eggs.
The shift happens when you stop mixing everything in one bowl and start treating the eggs like a structural tool. It changes the whole experience from a heavy fudge cake to something that actually bounces back when you press it.
This Chocolate Velvet Sponge Cake is all about that contrast. It gives you the intense, dark flavor of cocoa but keeps the weight low, making it feel light on the palate.
The Best Chocolate Velvet Sponge Cake
What Makes This Special
The magic here is the aeration. By whipping the egg whites separately, we create thousands of tiny air bubbles that expand in the heat of the oven.
Whipping Whites: This creates a protein foam that holds the cake up. Separated Eggs: It allows us to build a stable base with the yolks before adding the lift from the whites.
Since we aren't using a massive amount of butter, the texture stays light. If you love this profile, my Easy Red Velvet Cake uses a similar balance of cocoa and acid to get that signature crumb.
| Feature | Fresh (Egg Whipped) | Shortcut (Oil Based) |
|---|---|---|
| Texture | Airy and light | Dense and moist |
| Effort | Medium (separate eggs) | Low (one bowl) |
| Best Use | Tea time, light dessert | Layer cakes with frosting |
The difference is mainly in the "mouthfeel." A shortcut cake relies on chemical leaveners and fat for moisture, while this version uses physical air for its structure.
The Core Ingredients
I've listed everything you need below. Stick to the Dutch process cocoa if you can, as it's treated with alkali to reduce acidity and gives the cake a darker, more uniform color.
- 3/4 cup (90g) All purpose flour Why this? Provides the basic structure without being too heavy
- 1/2 cup (45g) Dutch process cocoa powder Why this? Deeper color and smoother chocolate taste
- 1/2 tsp (3g) Baking powder Why this? Extra insurance for the rise
- 1/4 tsp (1g) Salt Why this? Cuts through the sugar and boosts cocoa
- 3 Large eggs, separated Why this? Whites provide lift, yolks provide richness
- 1/2 cup (100g) Coconut sugar Why this? Adds a subtle caramel note
- 2 tbsp (30ml) Whole milk Why this? Adds a touch of moisture to the yolk base
- 1 tsp (5ml) Pure vanilla extract Why this? Rounds out the chocolate flavor
- 1 tbsp (14g) Unsalted butter, melted and cooled Why this? Adds a bit of shine and fat
- 2 tbsp (16g) Powdered sugar for dusting
- Fresh raspberries for pairing
Ingredient Deep Dive
Understanding what each part does helps you avoid the most common mistakes, like over mixing or deflating the batter.
| Ingredient | What It Does | Best Swap |
|---|---|---|
| Coconut Sugar | Sweetens and browns | Brown sugar (adds more molasses) |
| Whole Milk | Hydrates the batter | Almond milk (slightly lighter) |
| Unsalted Butter | Adds richness | Coconut oil (similar fat content) |
| Cocoa Powder | Primary flavor | Dark cocoa (for an even deeper hue) |
Most people think you can just swap any sugar for another, but coconut sugar behaves a bit differently during the bake. It doesn't dissolve as quickly as white sugar, which contributes to that slightly chewy, velvety interior.
Tools You'll Need
You don't need a professional kitchen for this, but a few specific tools make the process way easier.
- 8 inch cake pan (round)
- Parchment paper
- Fine mesh sifter
- Electric hand mixer or stand mixer (such as KitchenAid)
- Rubber spatula (essential for folding)
- Two mixing bowls (one must be spotlessly clean)
Step-by-step Baking Guide
Right then, let's get into it. The most important part is being gentle once the egg whites are in the mix.
- Preheat your oven to 325°F (163°C). Grease an 8 inch cake pan with butter and line the bottom with parchment paper.
- Sift the all purpose flour, cocoa powder, baking powder, and salt into a bowl. Note: This removes cocoa clumps that won't disappear later.
- Whisk the egg yolks with half of the coconut sugar in a bowl until the mixture becomes pale and thick.
- Stir in the milk, vanilla extract, and melted butter.
- In a spotlessly clean bowl, whip the egg whites on medium speed until foamy. Note: As noted by King Arthur Baking, any trace of fat in the bowl will stop the peaks from forming.
- Gradually add the remaining coconut sugar to the egg whites, whipping until stiff, glossy peaks form.
- Use a rubber spatula to gently fold the egg yolk mixture into the whipped egg whites. Note: Do this slowly so you don't pop the air bubbles.
- Sift the dry ingredients over the batter and fold gently until just combined.
- Pour the batter into the pan and bake for 25 minutes until a toothpick inserted into the center comes out clean.
- Let the cake cool, then dust with powdered sugar and serve with raspberries.
Chef's Tip: If you want an even deeper flavor, add a teaspoon of instant espresso powder to your dry ingredients. It doesn't make the cake taste like coffee, but it makes the chocolate taste "more like chocolate."
Fixing Common Issues
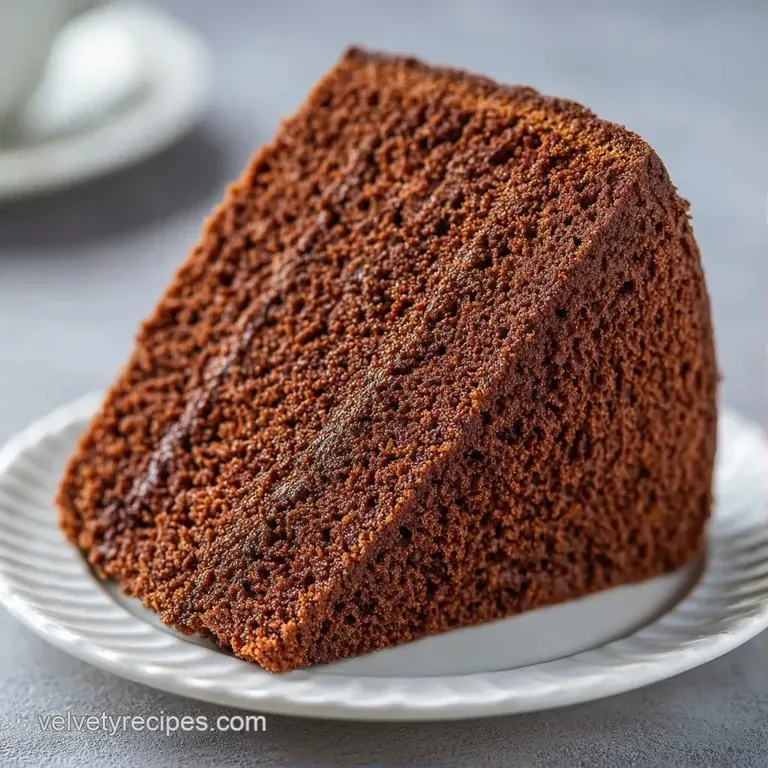
When a Chocolate Velvet Sponge Cake goes wrong, it's usually because the air escaped. If your cake feels more like a pancake than a sponge, check these culprits.
Troubleshooting Common Issues
| Issue | Solution |
|---|---|
| Why Your Cake Didn't Rise | This usually happens if the egg whites were under whipped or if you stirred the batter too aggressively. If the peaks weren't stiff, there wasn't enough structure to hold the weight of the cocoa. |
| Why the Crumb is Rubbery | Over mixing the flour develops too much gluten. Once you add the dry ingredients, fold them in just until you can't see any white streaks. |
| Why the Middle Sank | Opening the oven door too early lets out the heat and causes the air bubbles to collapse before the cake is set. |
Customizing Your Cake
You can easily tweak this recipe to fit your mood. For something even more basic and light, try this Simple Velvet Sponge Recipe.
- For a Richer Profile: Use 100% dark cocoa powder and replace the milk with heavy cream.
- For an Espresso Twist: Fold in 1/2 teaspoon of finely ground coffee.
- For a Fruitier Version: Press a few fresh raspberries into the top of the batter before baking.
Decision Shortcut: If you want it richer → Use dark cocoa. If you want more lift → Use a copper bowl for whites. If you want it denser → Stir in some melted chocolate.
One thing to remember is that searing or "browning" isn't the goal here. Some people try to bake sponges at high heat to get a crust, but that just dries out the interior. Keep the temp low and steady.
Storage and Leftovers
Since this cake has very little fat, it can dry out faster than a traditional butter cake.
Storage: Keep it in an airtight container at room temperature for 2 days, or in the fridge for up to 5 days. If you refrigerate it, let it sit for 15 minutes before eating to regain its soft texture.
Freezing: Wrap individual slices in parchment paper and foil. They stay good for about 2 months. Thaw them in the fridge overnight.
Zero Waste: If you have a few stale slices, don't toss them. Cube the cake and toss it with a bit of melted butter and cinnamon in a pan to make a chocolate bread pudding.
Serving Your Cake
Presentation makes a huge difference with a Chocolate Velvet Sponge Cake. Because it's so light, you don't want to weigh it down with heavy frosting.
Dusting the top with powdered sugar gives it a professional, clean look. The tartness of fresh raspberries provides a sharp contrast to the rich cocoa, which keeps the dessert from feeling too heavy.
For a more indulgent touch, serve a slice with a dollop of lightly sweetened whipped cream or a drizzle of raspberry coulis. This keeps the focus on the airy texture while adding a layer of moisture.
Recipe FAQs
What is chocolate velvet sponge cake?
A light, airy cake with a smooth, fine crumb texture. Unlike dense chocolate cakes, this version relies on whipped egg whites for lift and Dutch process cocoa for a deep, velvety finish.
What is the difference between chocolate velvet cake and normal chocolate cake?
The primary difference is the crumb structure. Standard chocolate cakes are often dense and moist, whereas velvet cakes use a specific aeration technique to create a softer, more refined mouthfeel.
Is this cake safe for diabetics?
No, it contains sugar. While it uses coconut sugar, it still impacts blood glucose levels and should be consumed in moderation.
How to prevent the cake from sinking in the middle?
Avoid opening the oven door too early. This keeps the internal temperature stable and prevents air bubbles from collapsing before the cake structure has set.
How to ensure the cake has a velvet texture?
Sift all dry ingredients and fold gently. This removes cocoa clumps and preserves the air bubbles in the whipped eggs. If you enjoyed mastering this aeration, see how the same principle creates a light finish in our velvet parfait.
Is this a flourless chocolate cake?
No, this recipe requires all-purpose flour. The flour provides the essential structural framework needed to support the cocoa powder and whipped egg whites.
How to store the cake to keep it moist?
Seal it in an airtight container. Keep it at room temperature for 2 days or refrigerated for up to 5 days, letting it sit for 15 minutes before eating if chilled to regain softness.
Chocolate Velvet Sponge Cake

